New article
Recently updated
Policy Mangement: Create a workflow

This guide will take you through how to create a workflow in Ideagen Procedure Management. It is suitable for admin users setting up workflows for the first time.
1. Option 1: System Settings Operations Module
There are two ways you can set up your workflows. Firstly from the settings for the module you can select "Click here"
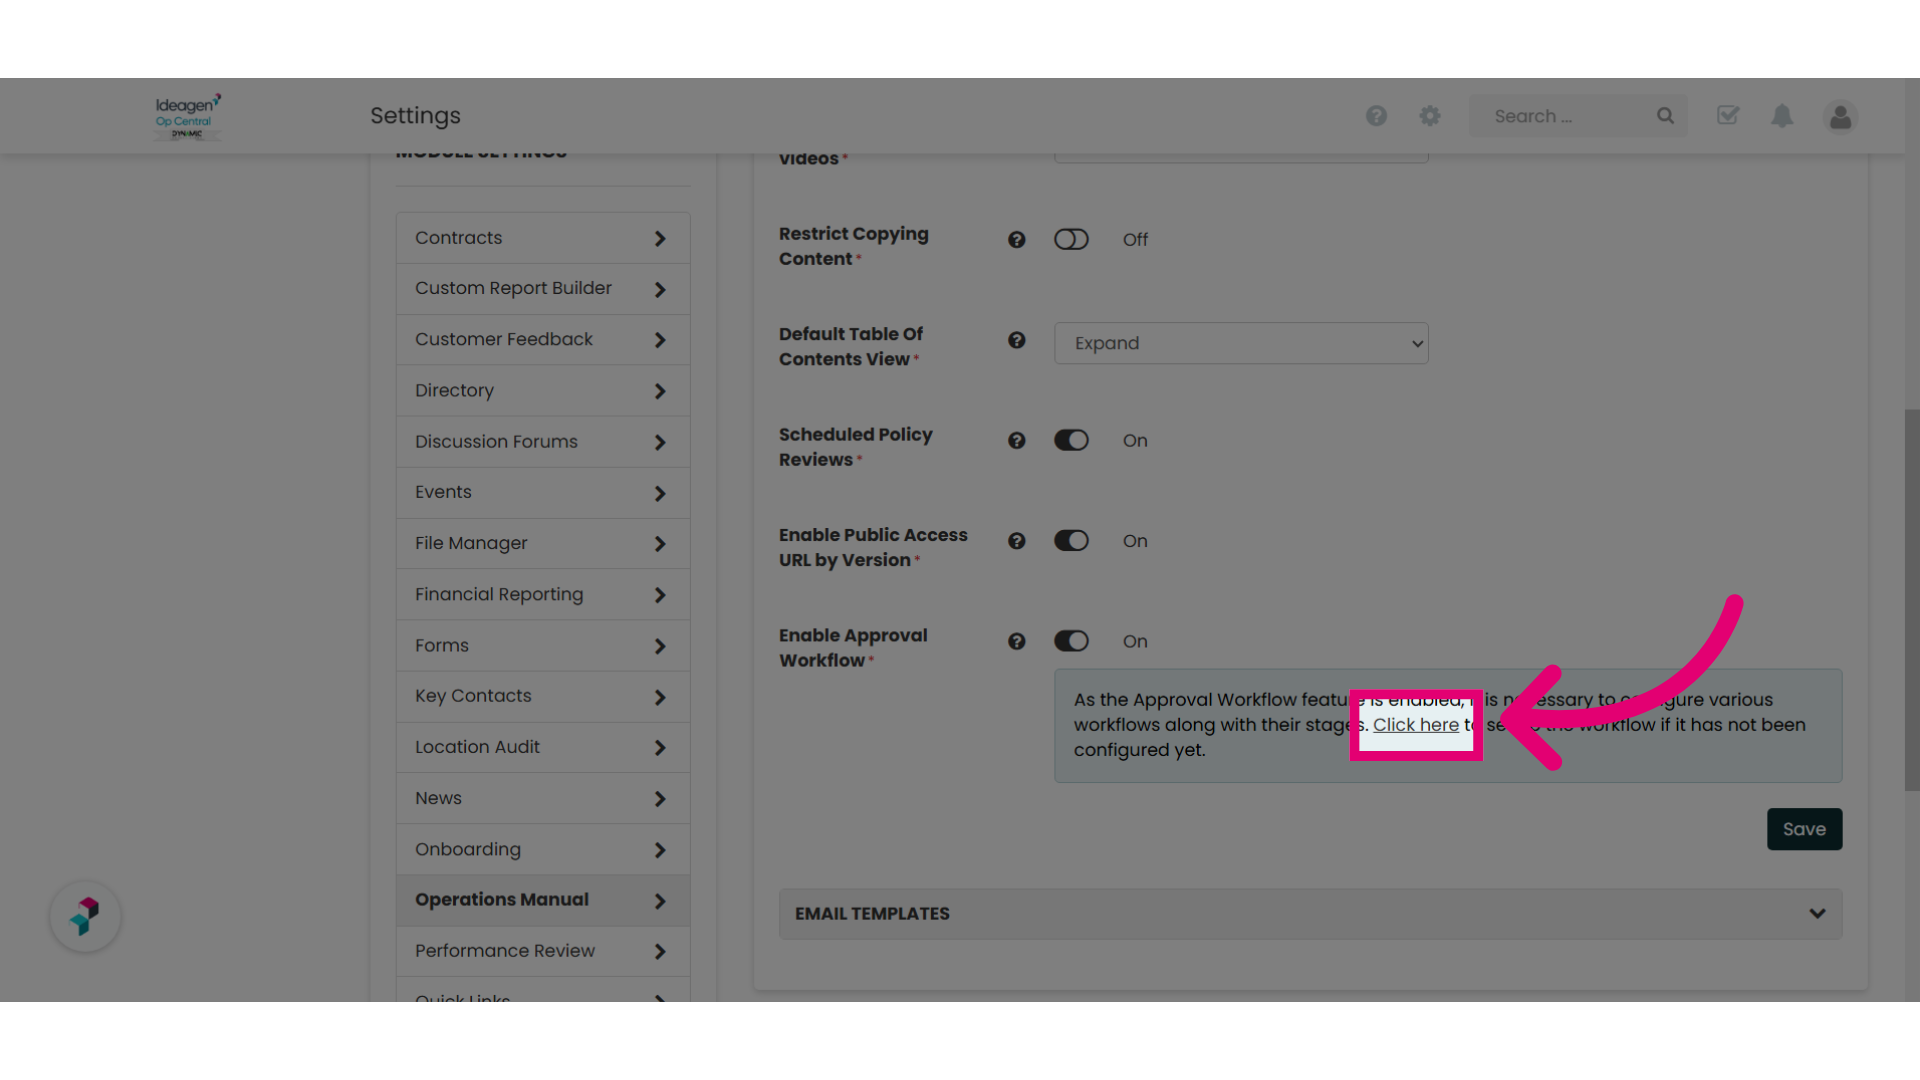
Operations Module" /
2. Option 2: Work Central
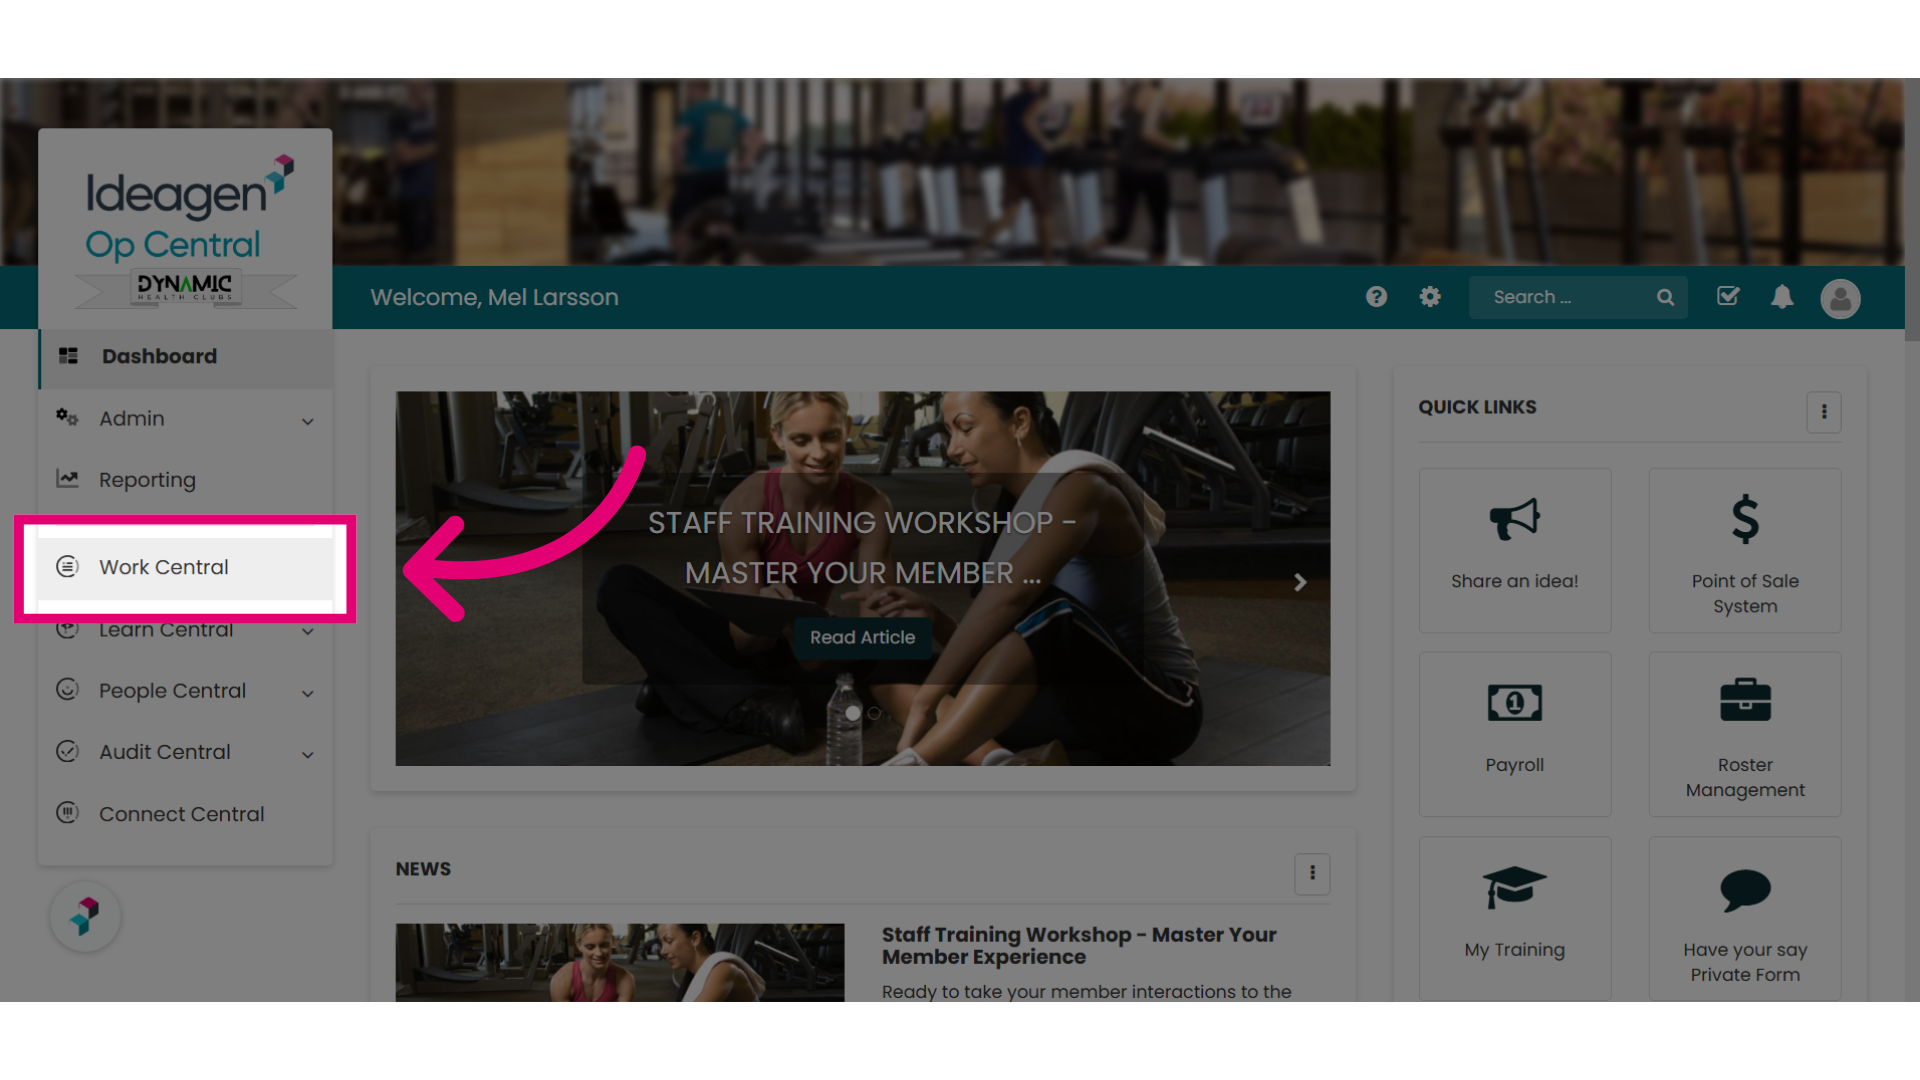
Or from the dashboard, select Work Central on the left. This may be called Operations Manual or something similar for some customers.
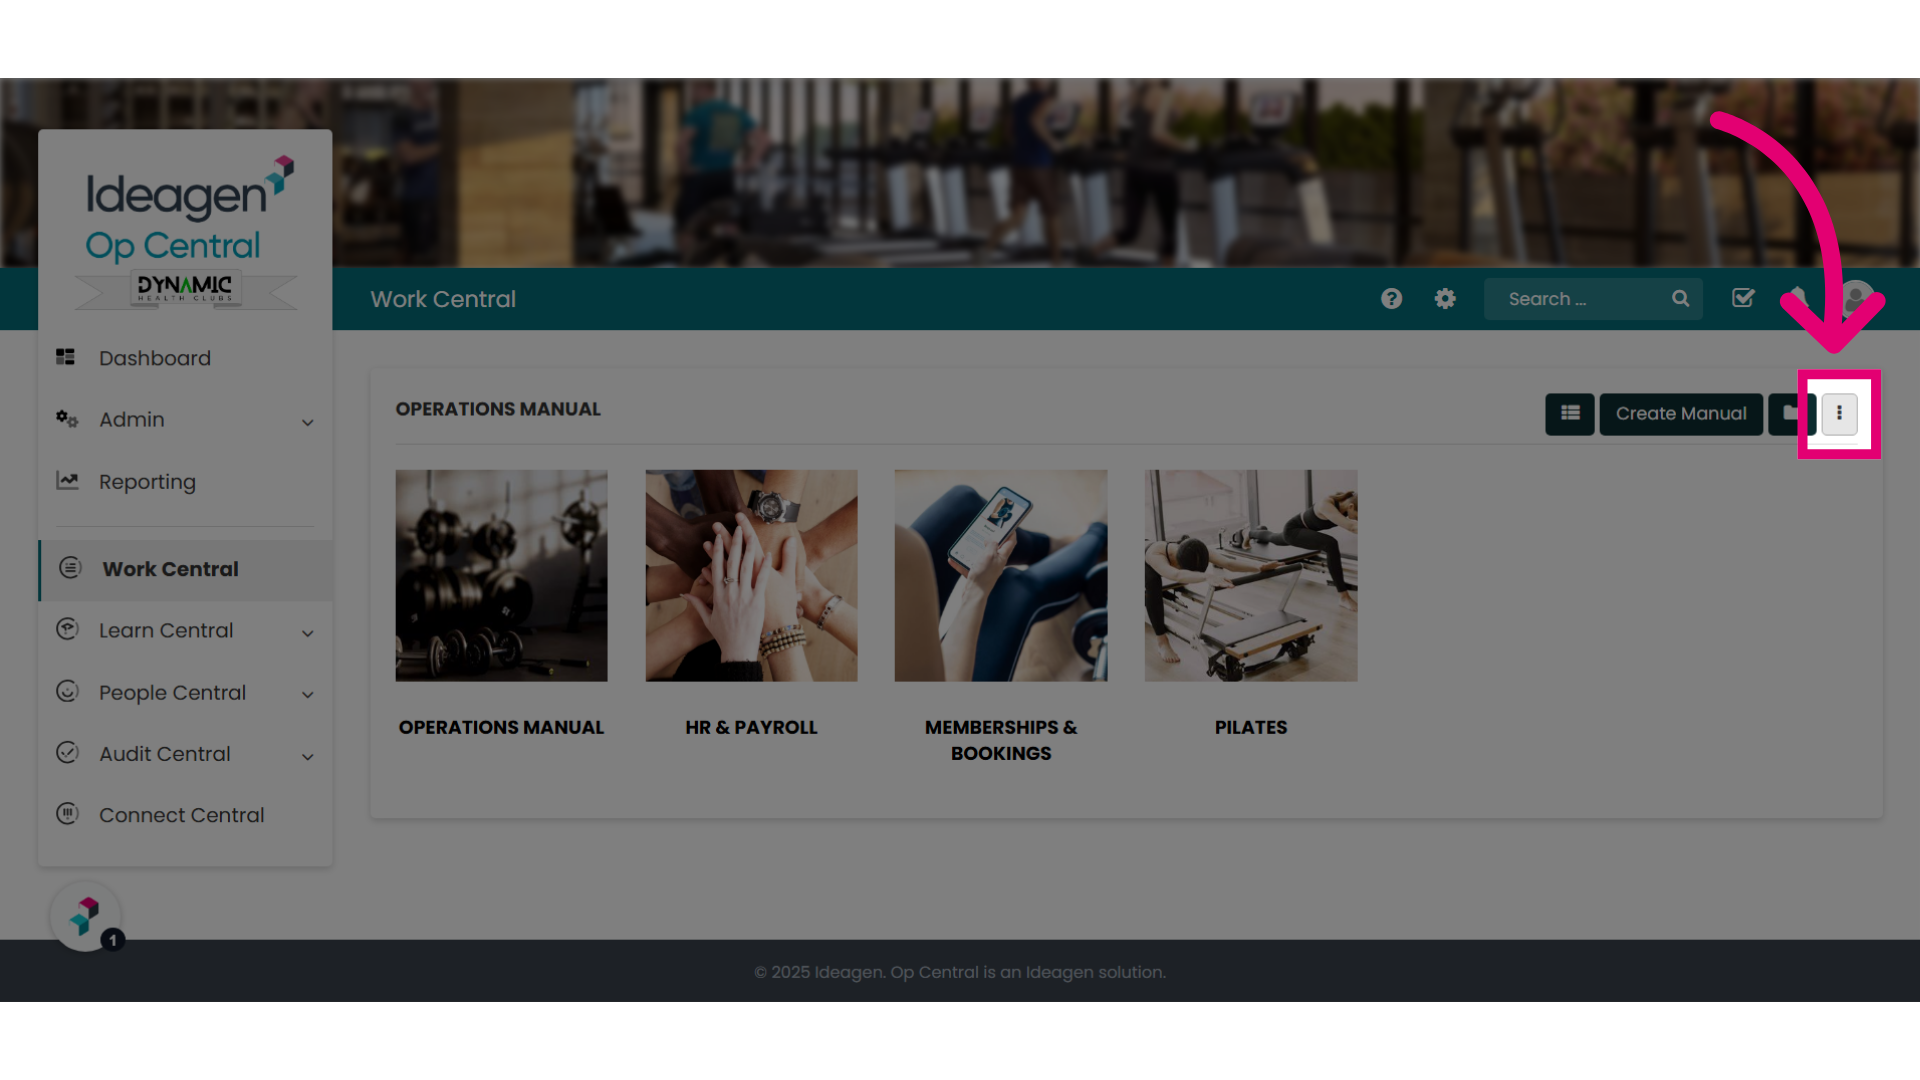
3. Select the ellipses on the top left of screen.
Select the ellipses. This will show for Admins and other user roles that have "Can Publish" enabled.
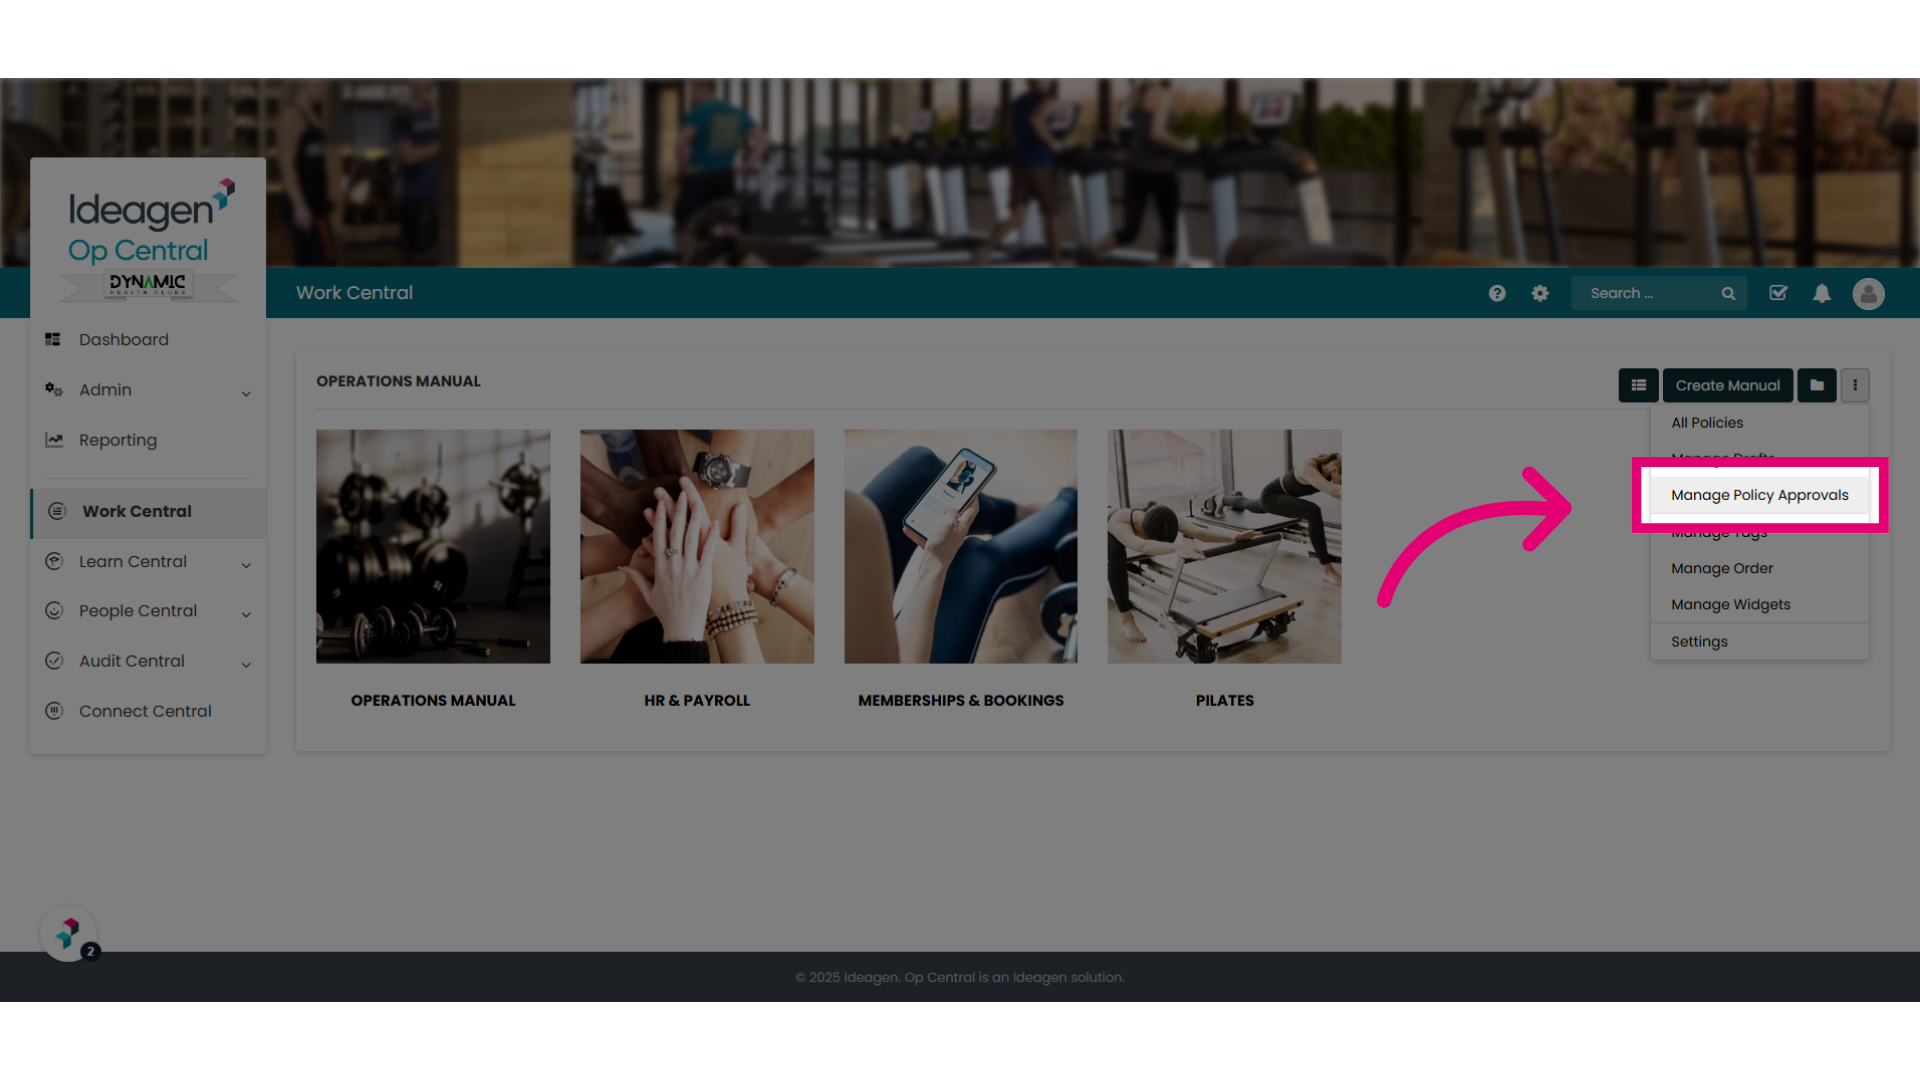
4. Click "Manage Policy Approvals"
Open the "Manage Policy Approvals" section.
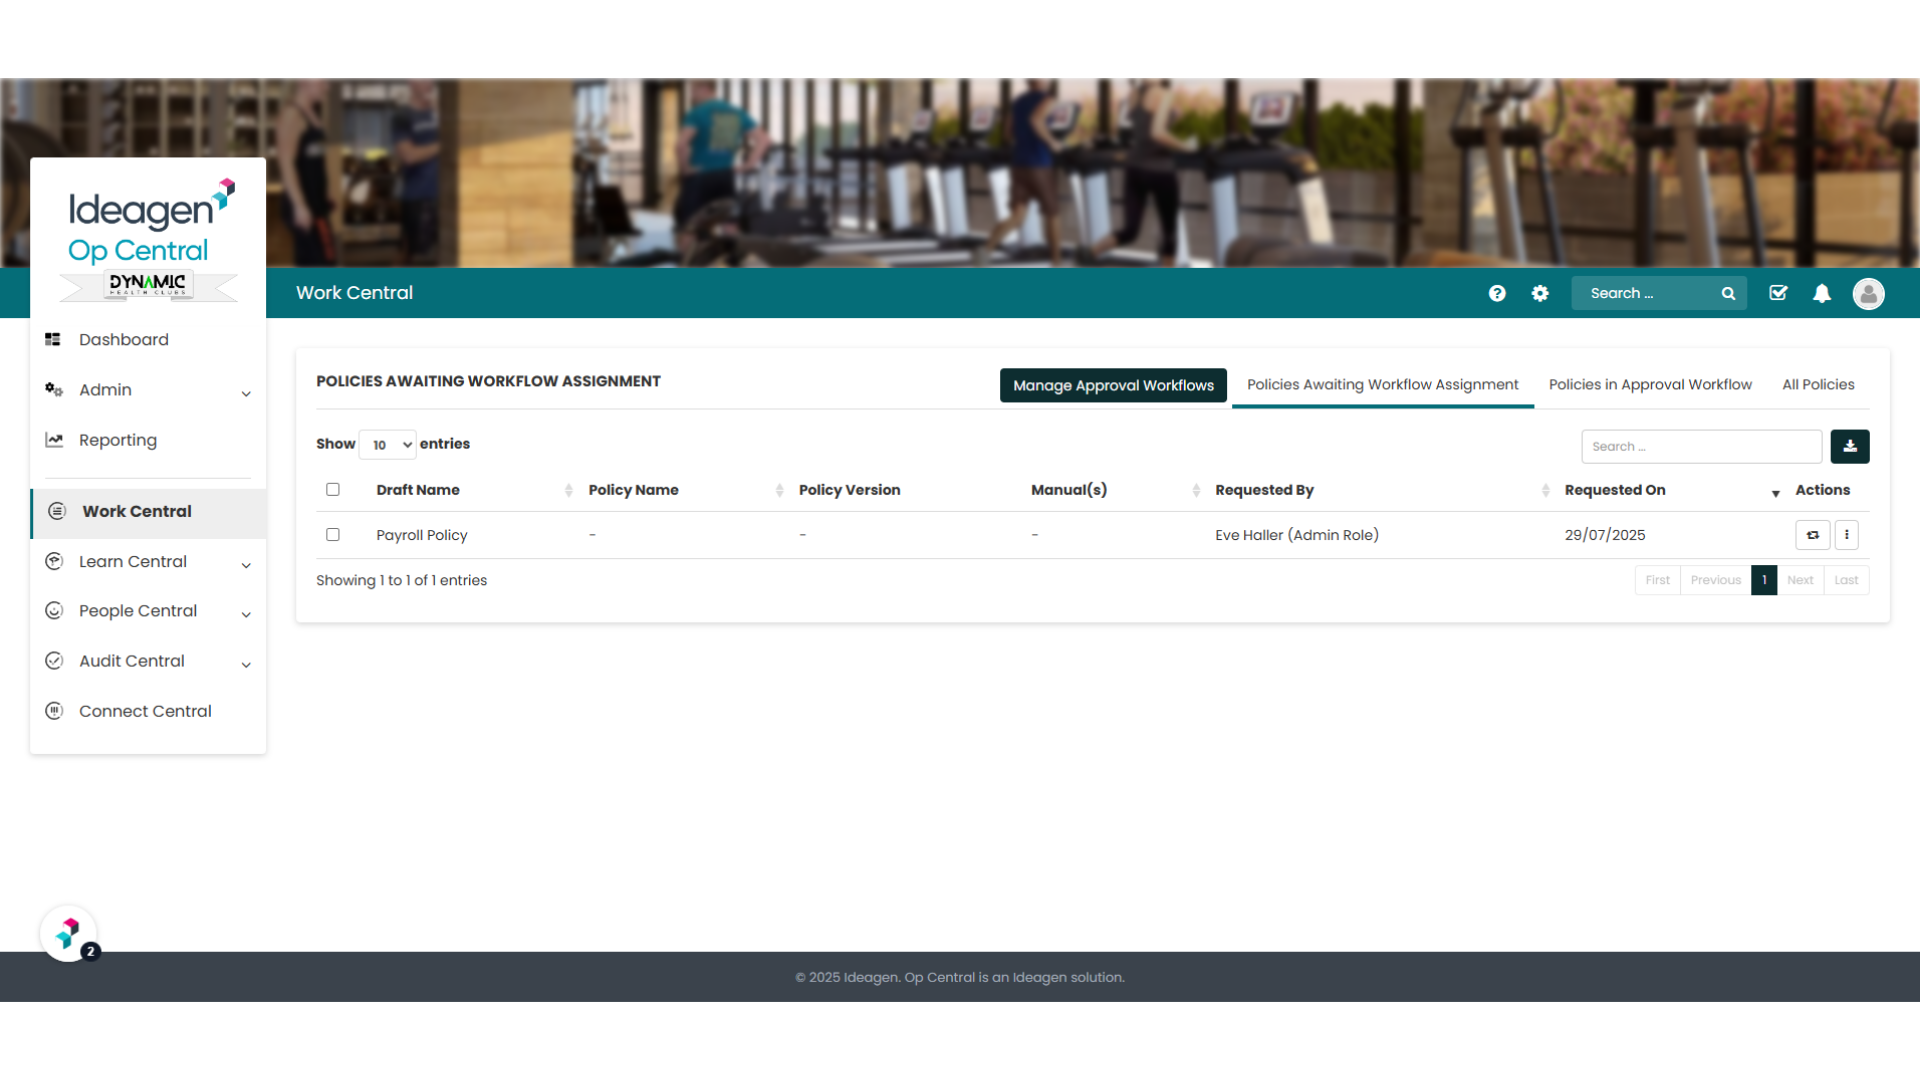
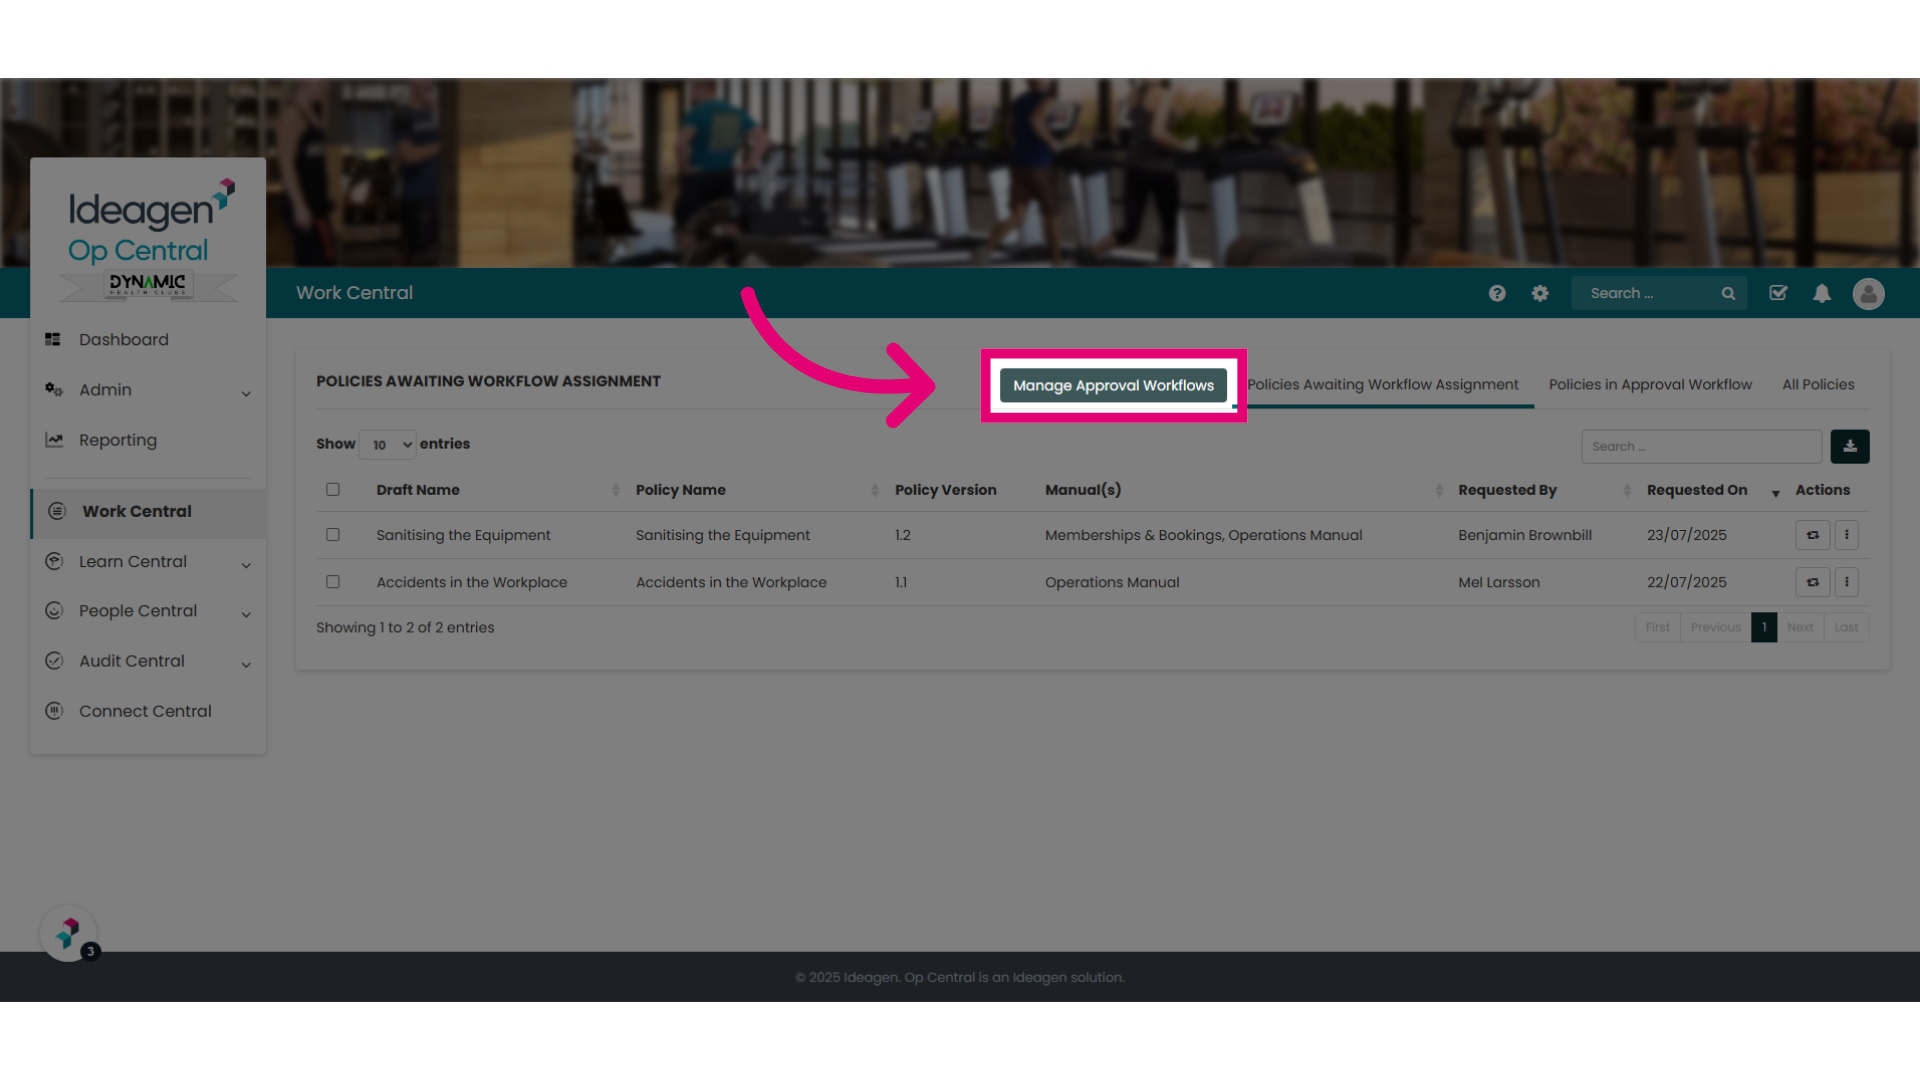
5. Click "Manage Approval Workflows"
Select the "Manage Approval Workflows" button.
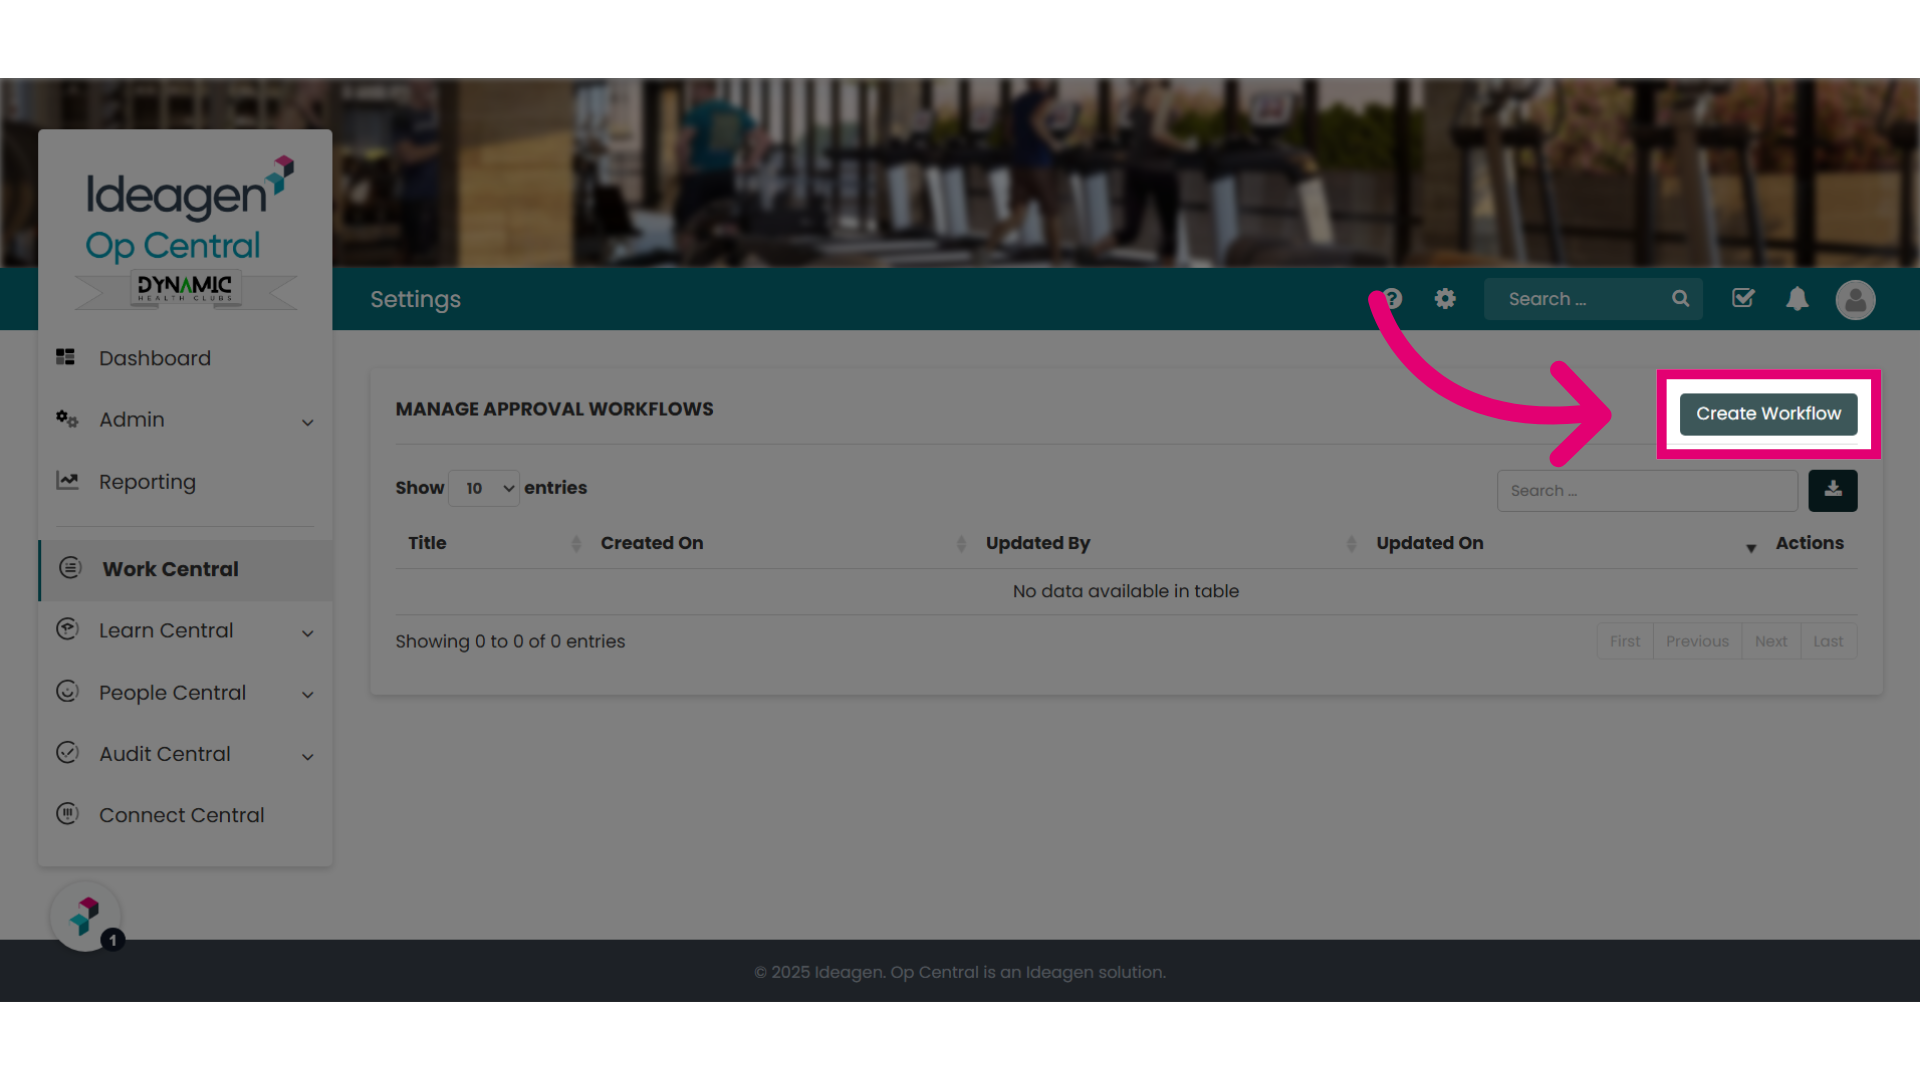
6. Click "Create Workflow"
A new screen will open. Navigate to "Create Workflow"
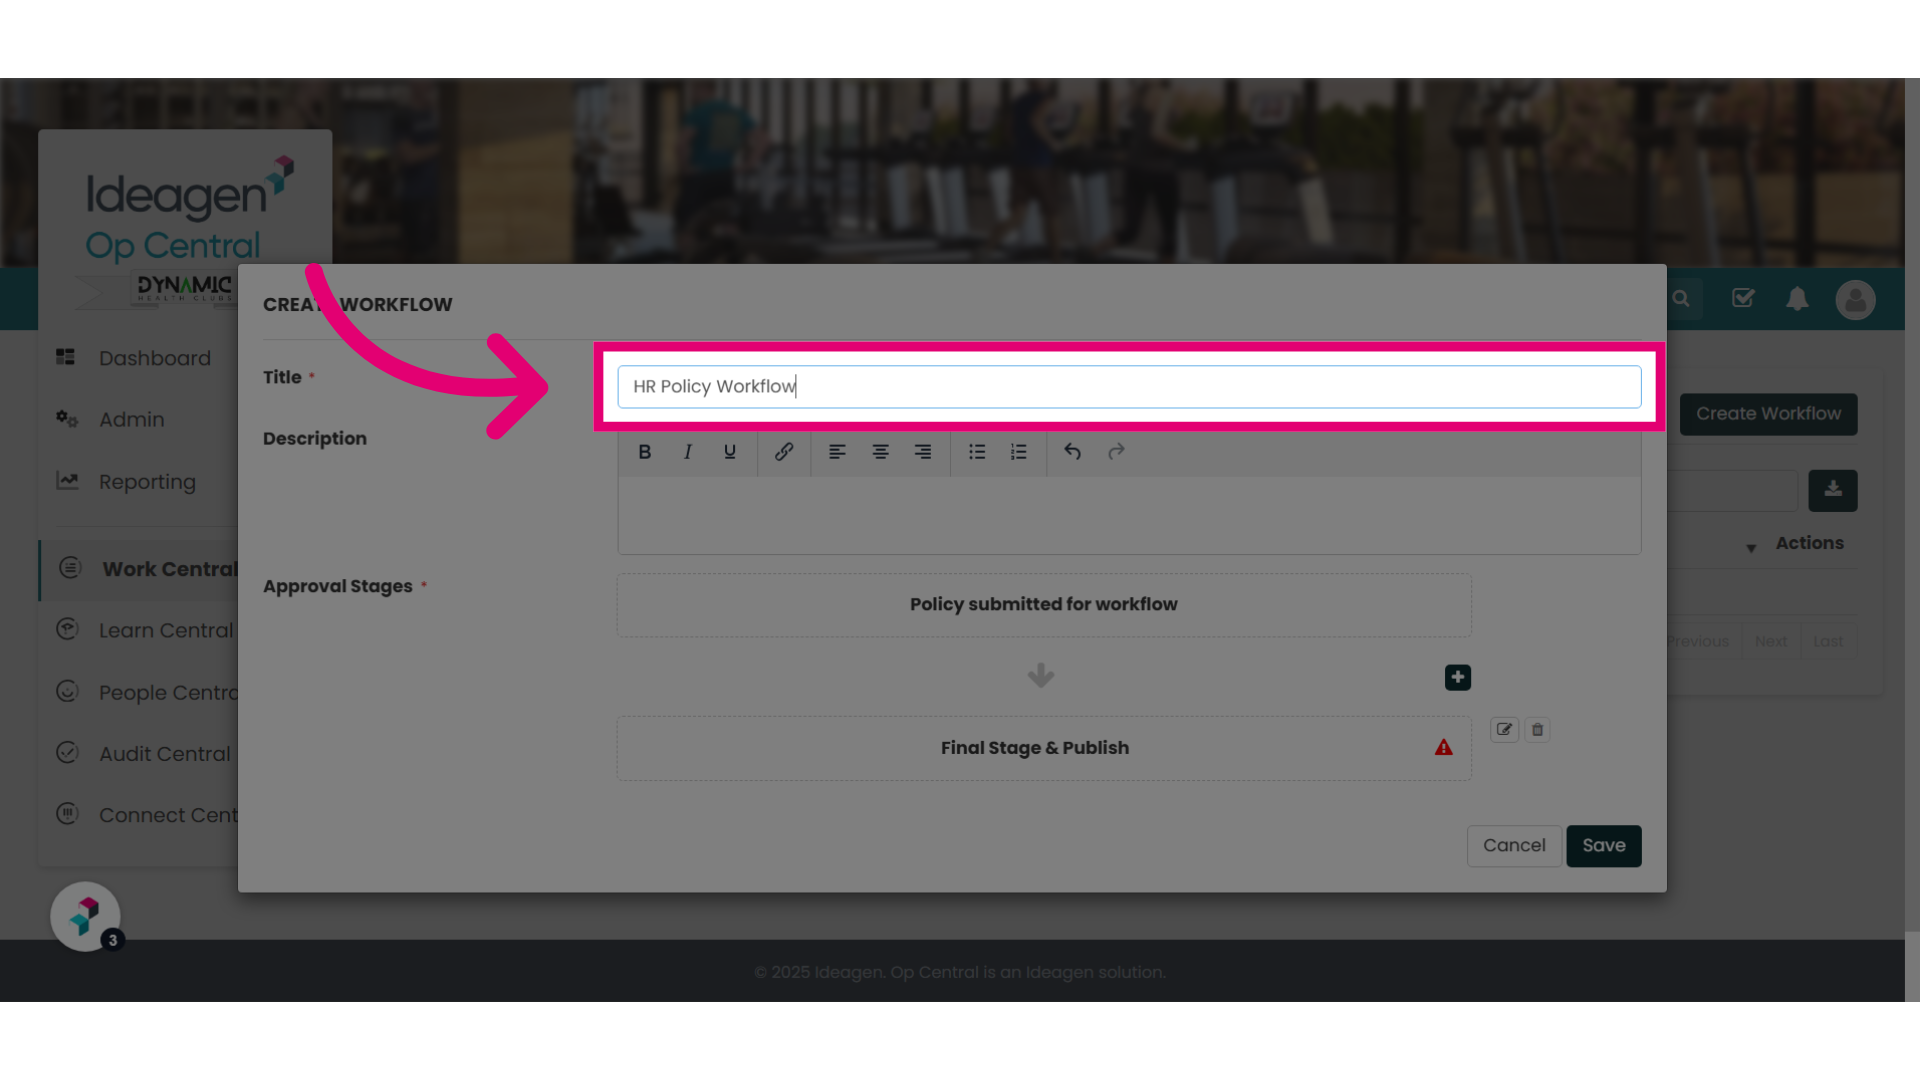
7. Enter a title for the workflow
Give your workflow an appropriate name.
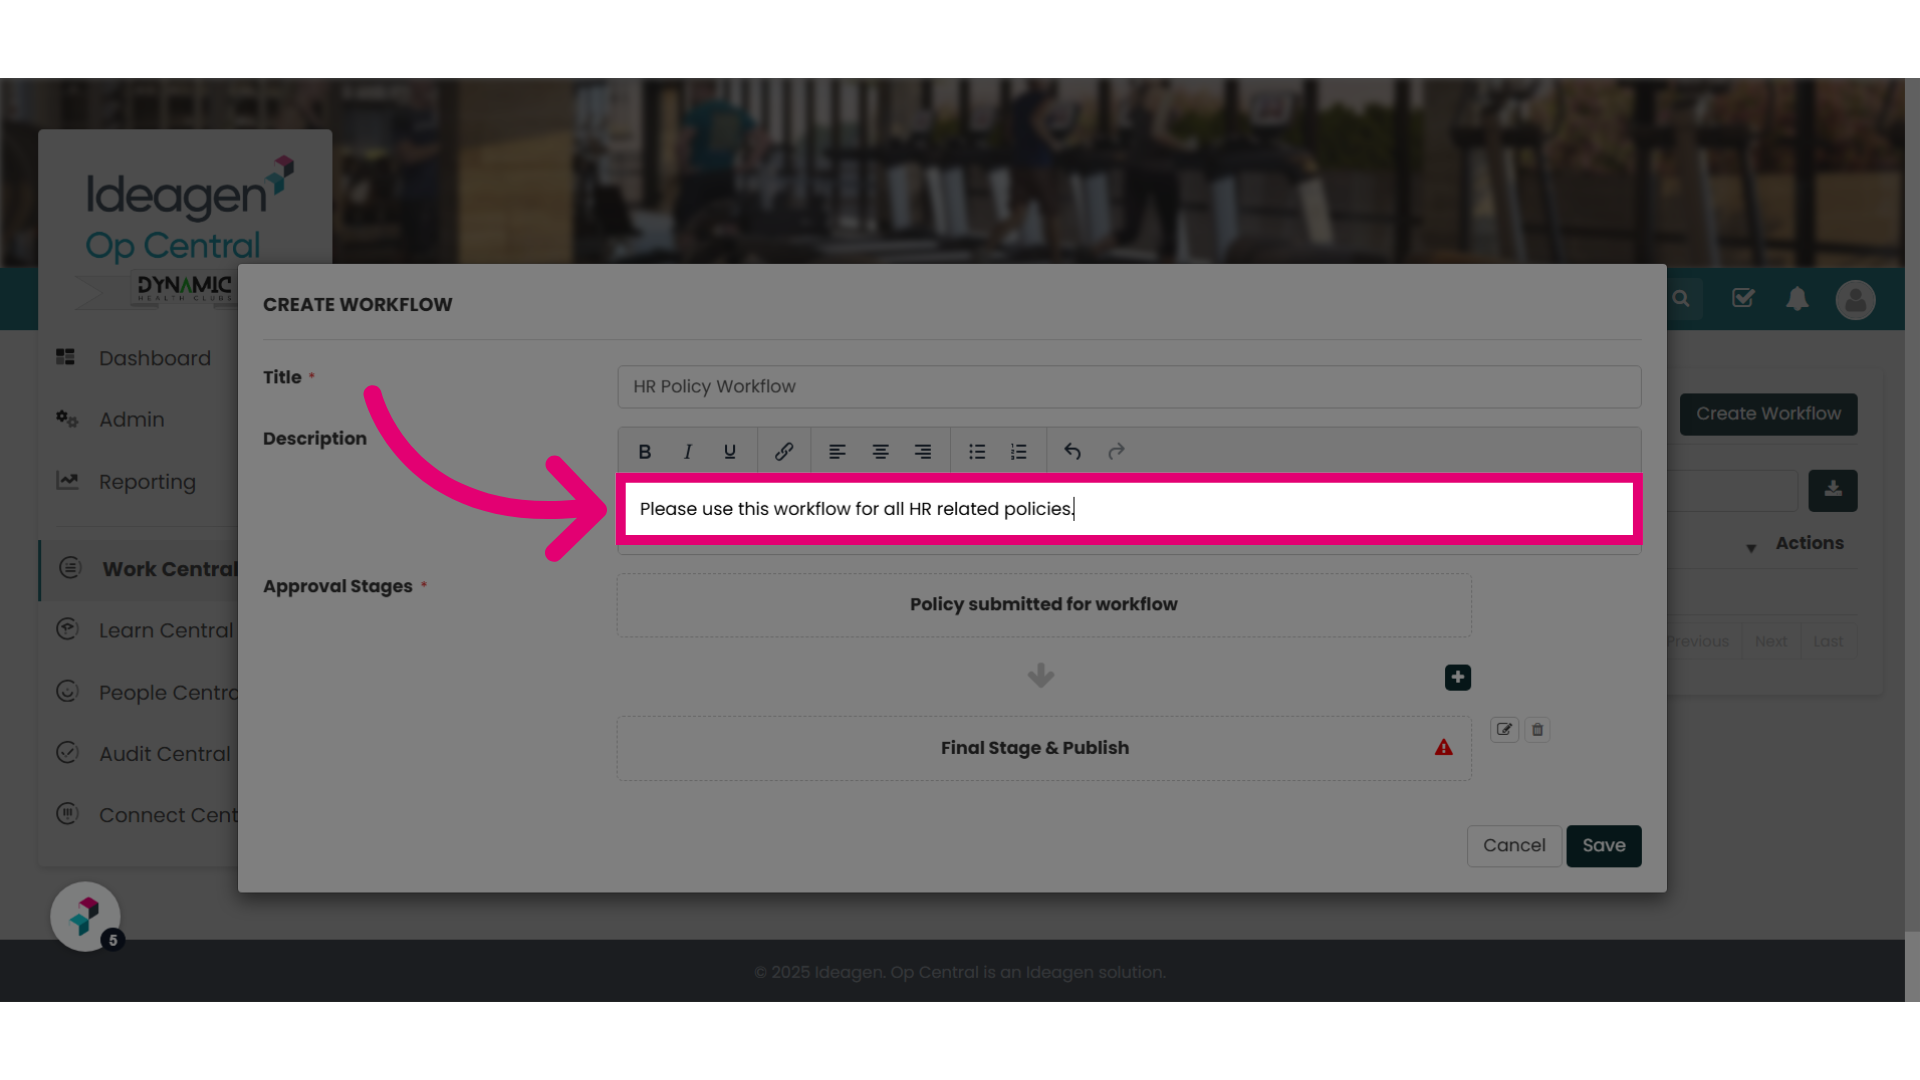
8. Give your workflow a description
Click the description field. Provide a description of the workflow.
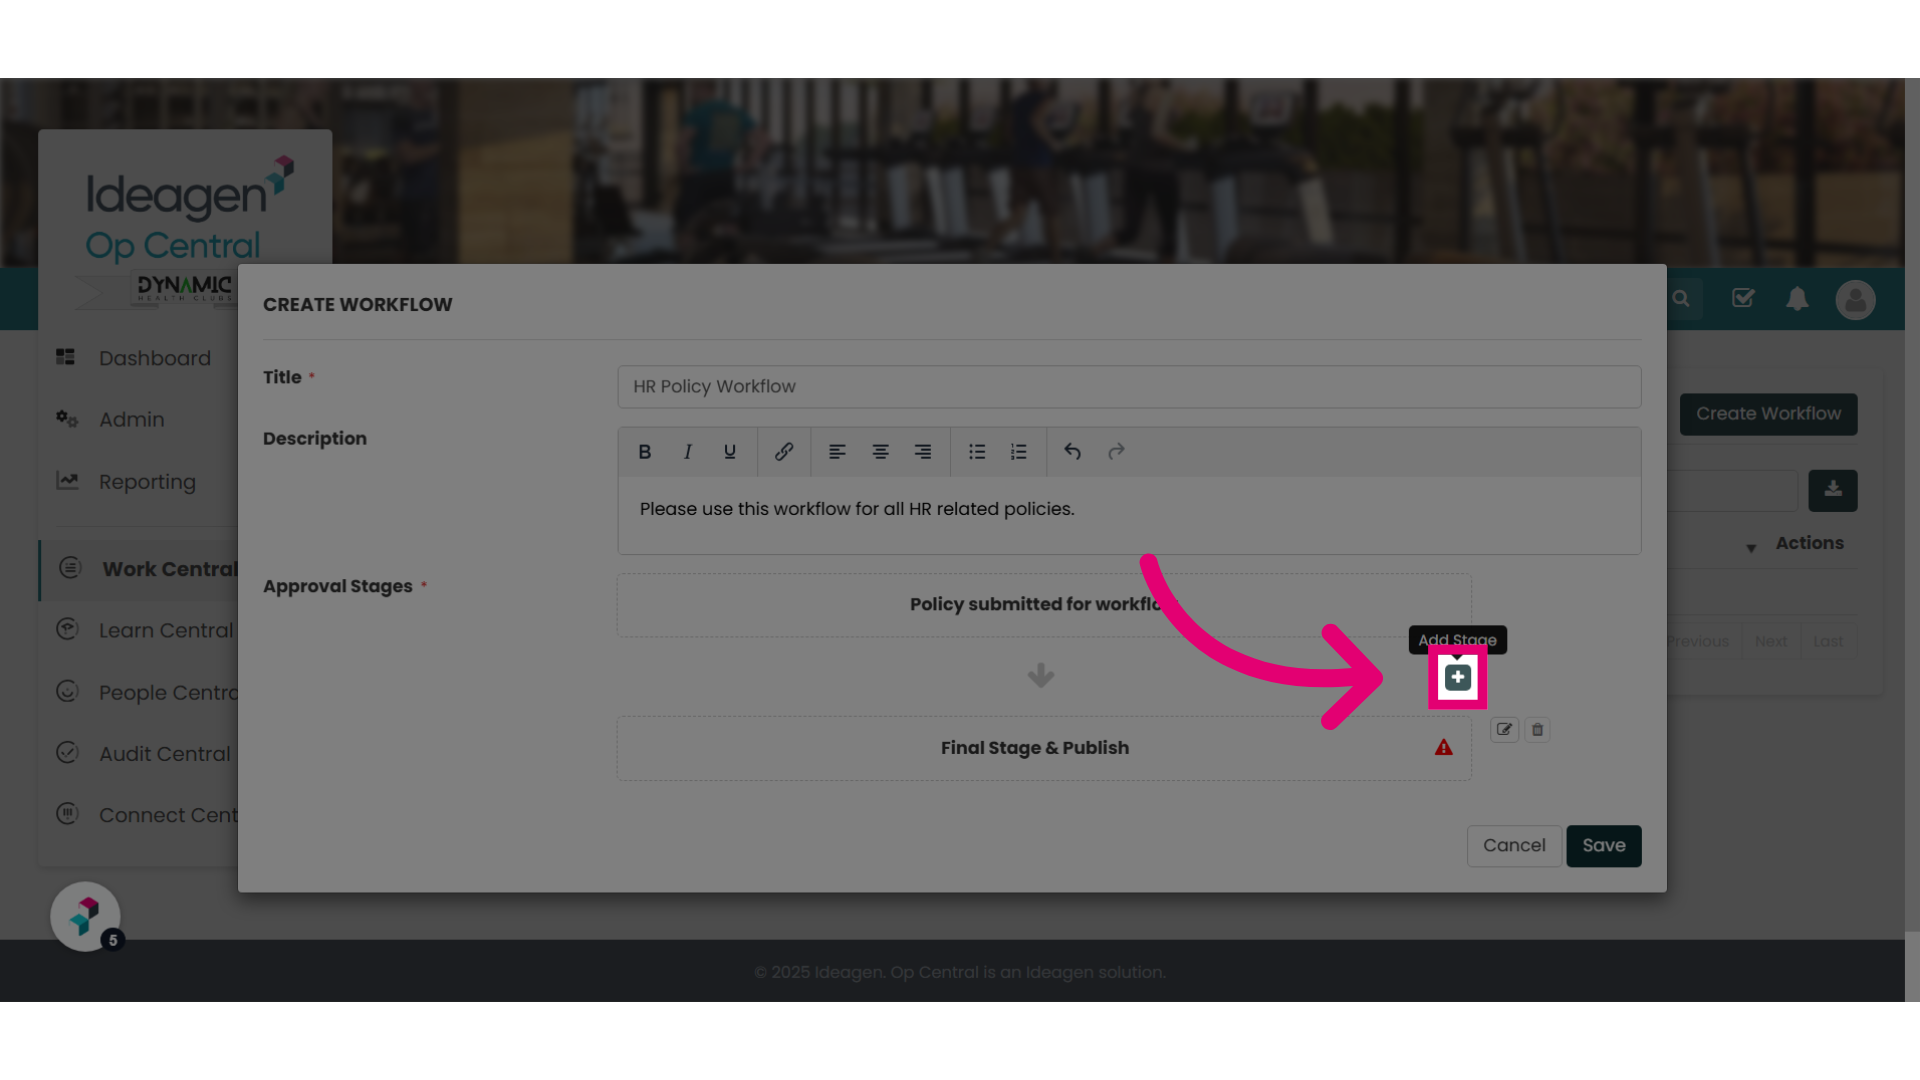
9. Find the + button
To add a stage to your workflow, select the plus button
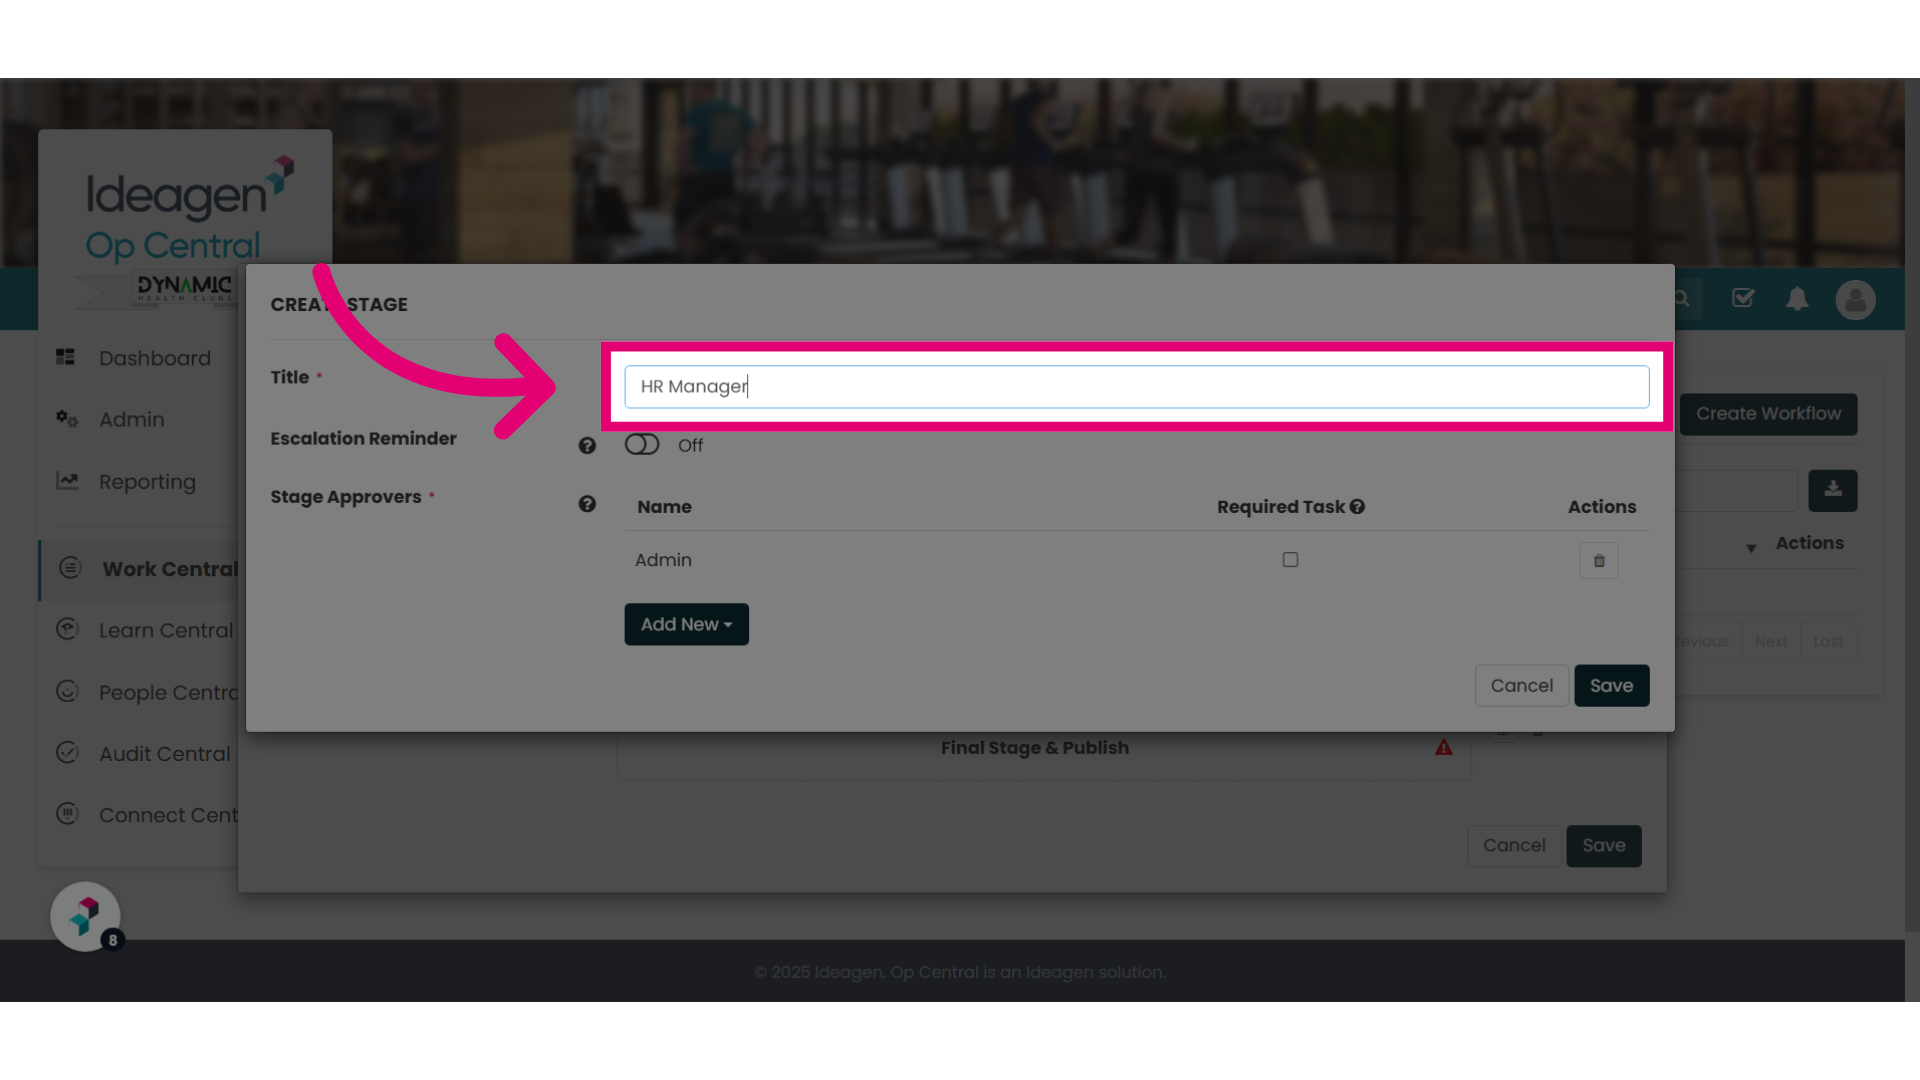
10. Give your workflow stage a relevant title
Select the Title field and Name the stage appropriately. You might want to indicate a person or department.
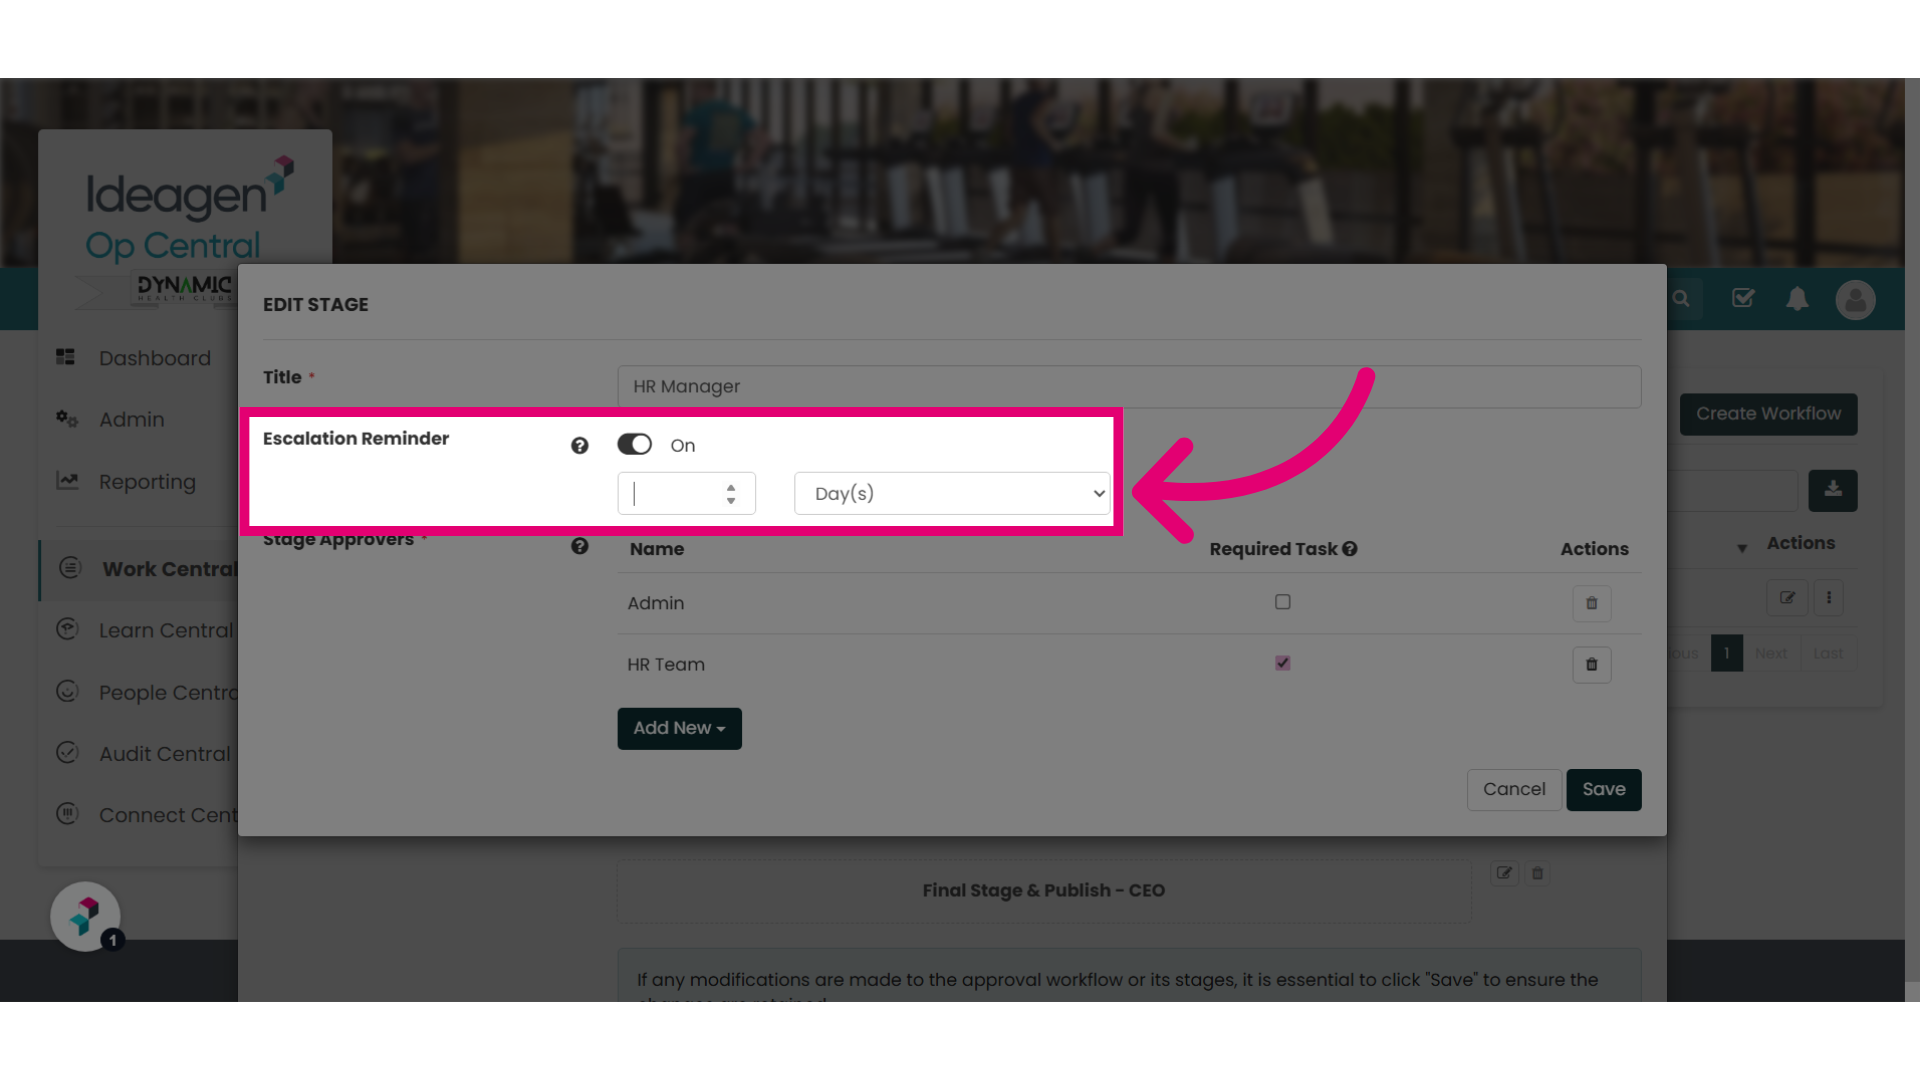
11. Set an escalation reminder
Select this toggle if you want to set an escalation reminder to users where this is set as a Required Task.
12. Navigate to "Add New" to add a role, user or user group to the workflow.
By default, Admins will always be able to perform an action in a workflow. This is consistent with the Admin role across all of Ideagen Procedure Management.
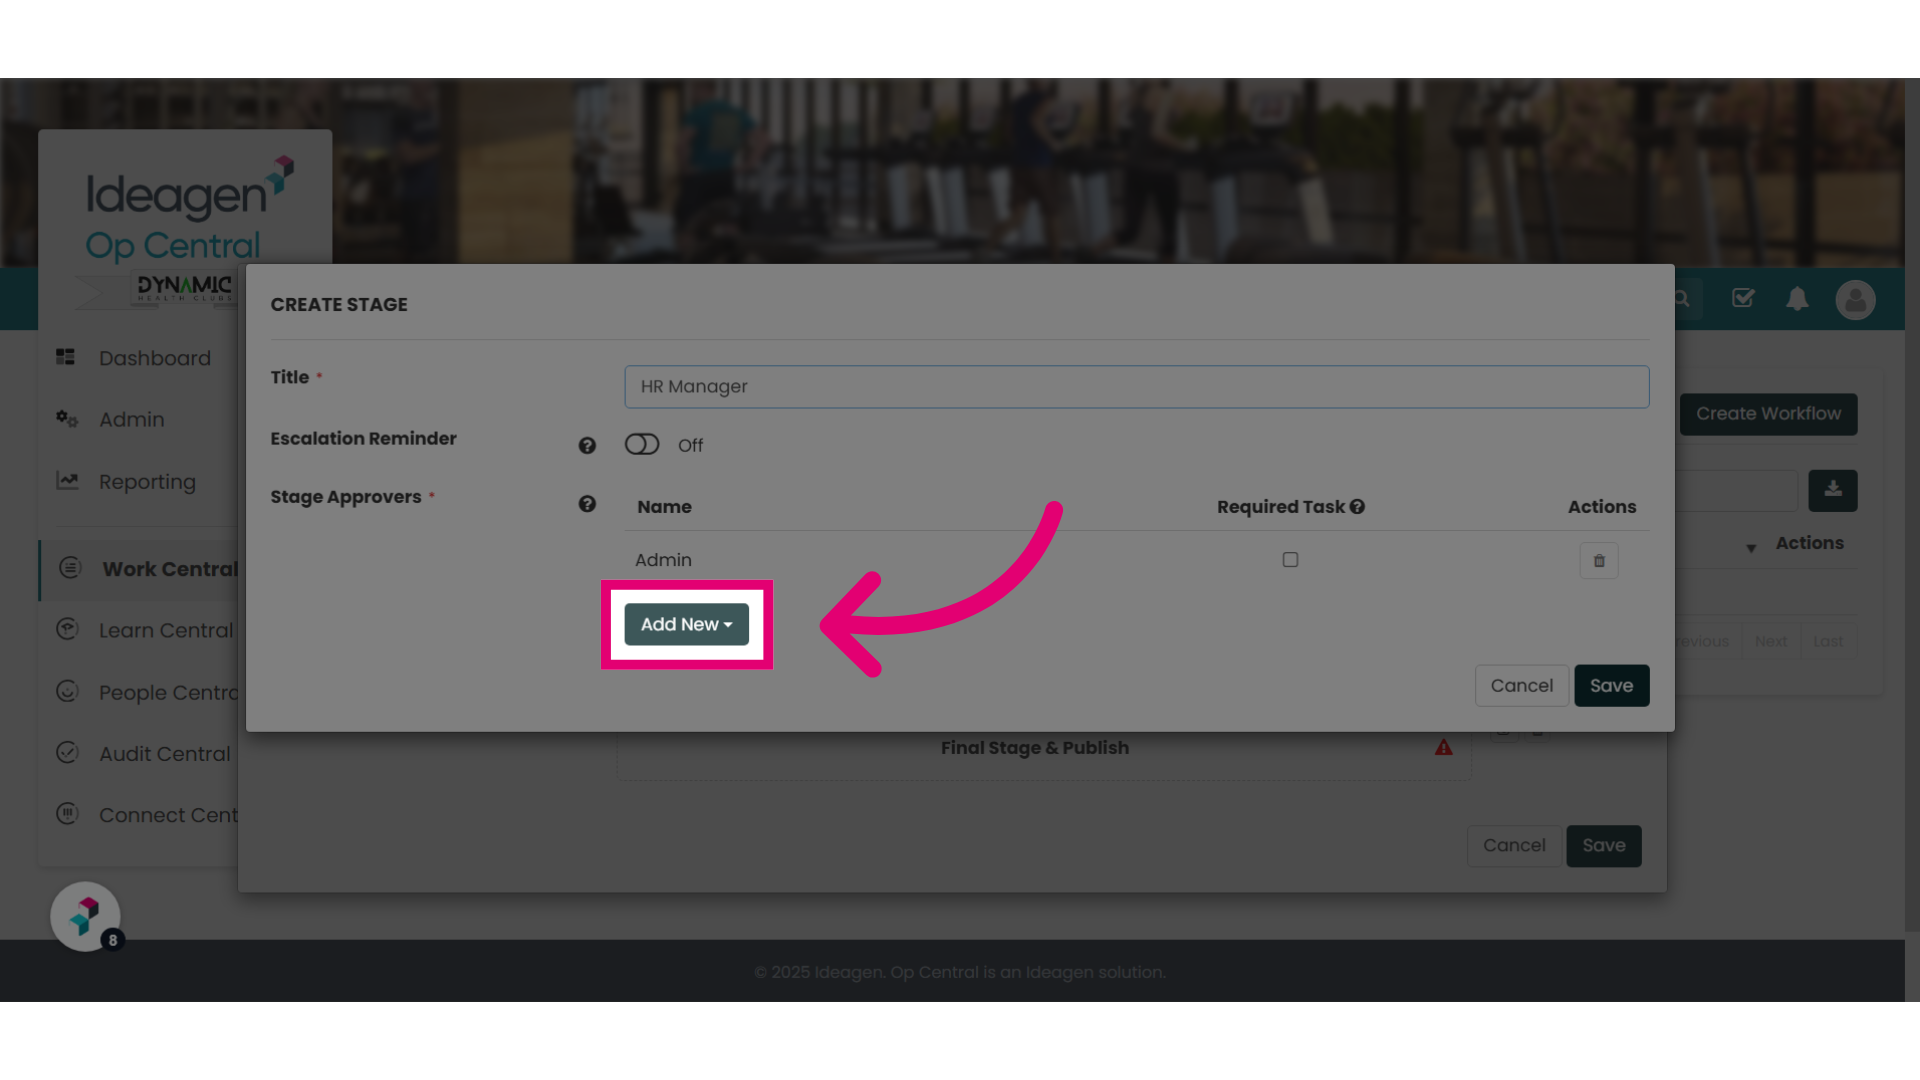
13. Select the option you require
Click on the "Add New Role" field, although you can also pick a specific user or user group to be part of the workflow. Regardless of what you select, only one person is needed to complete the task for it to progress.
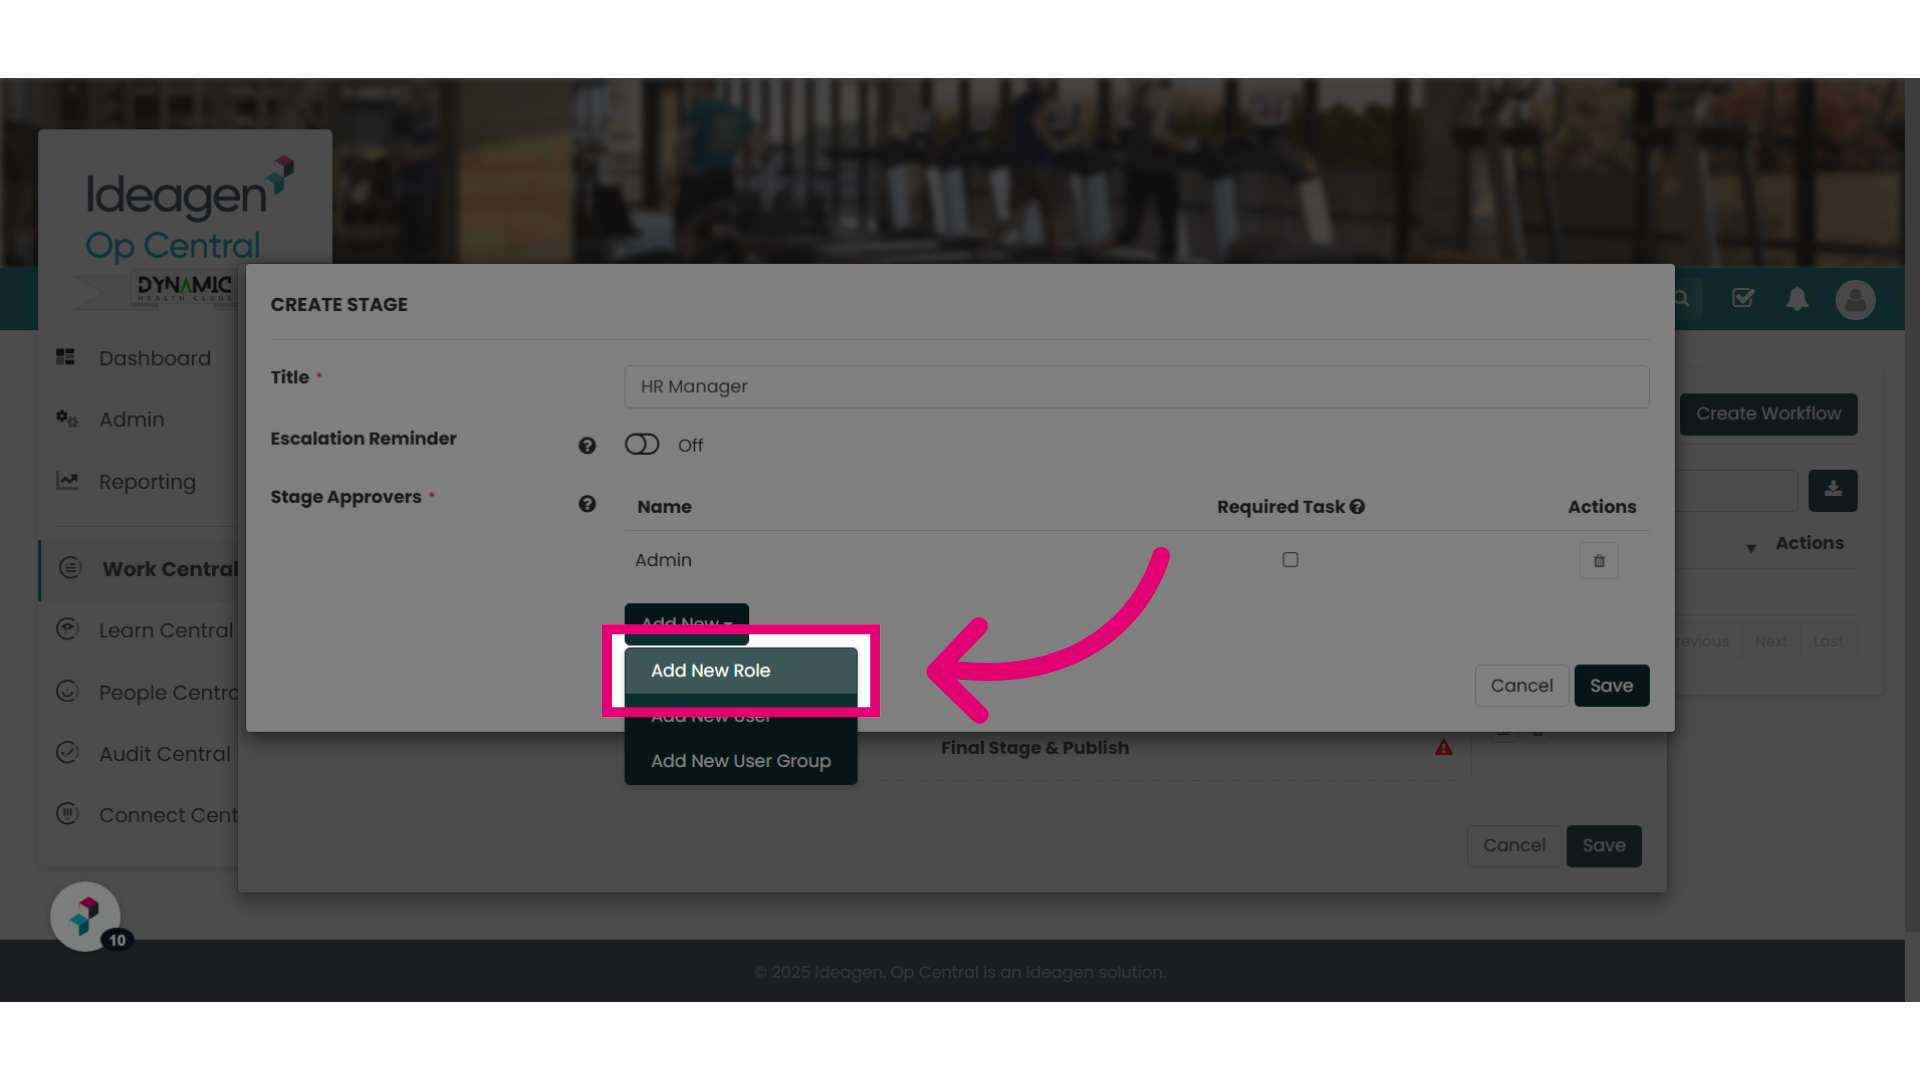
14. Example: "Select role..."
Following this example, click the option to "Select role..."
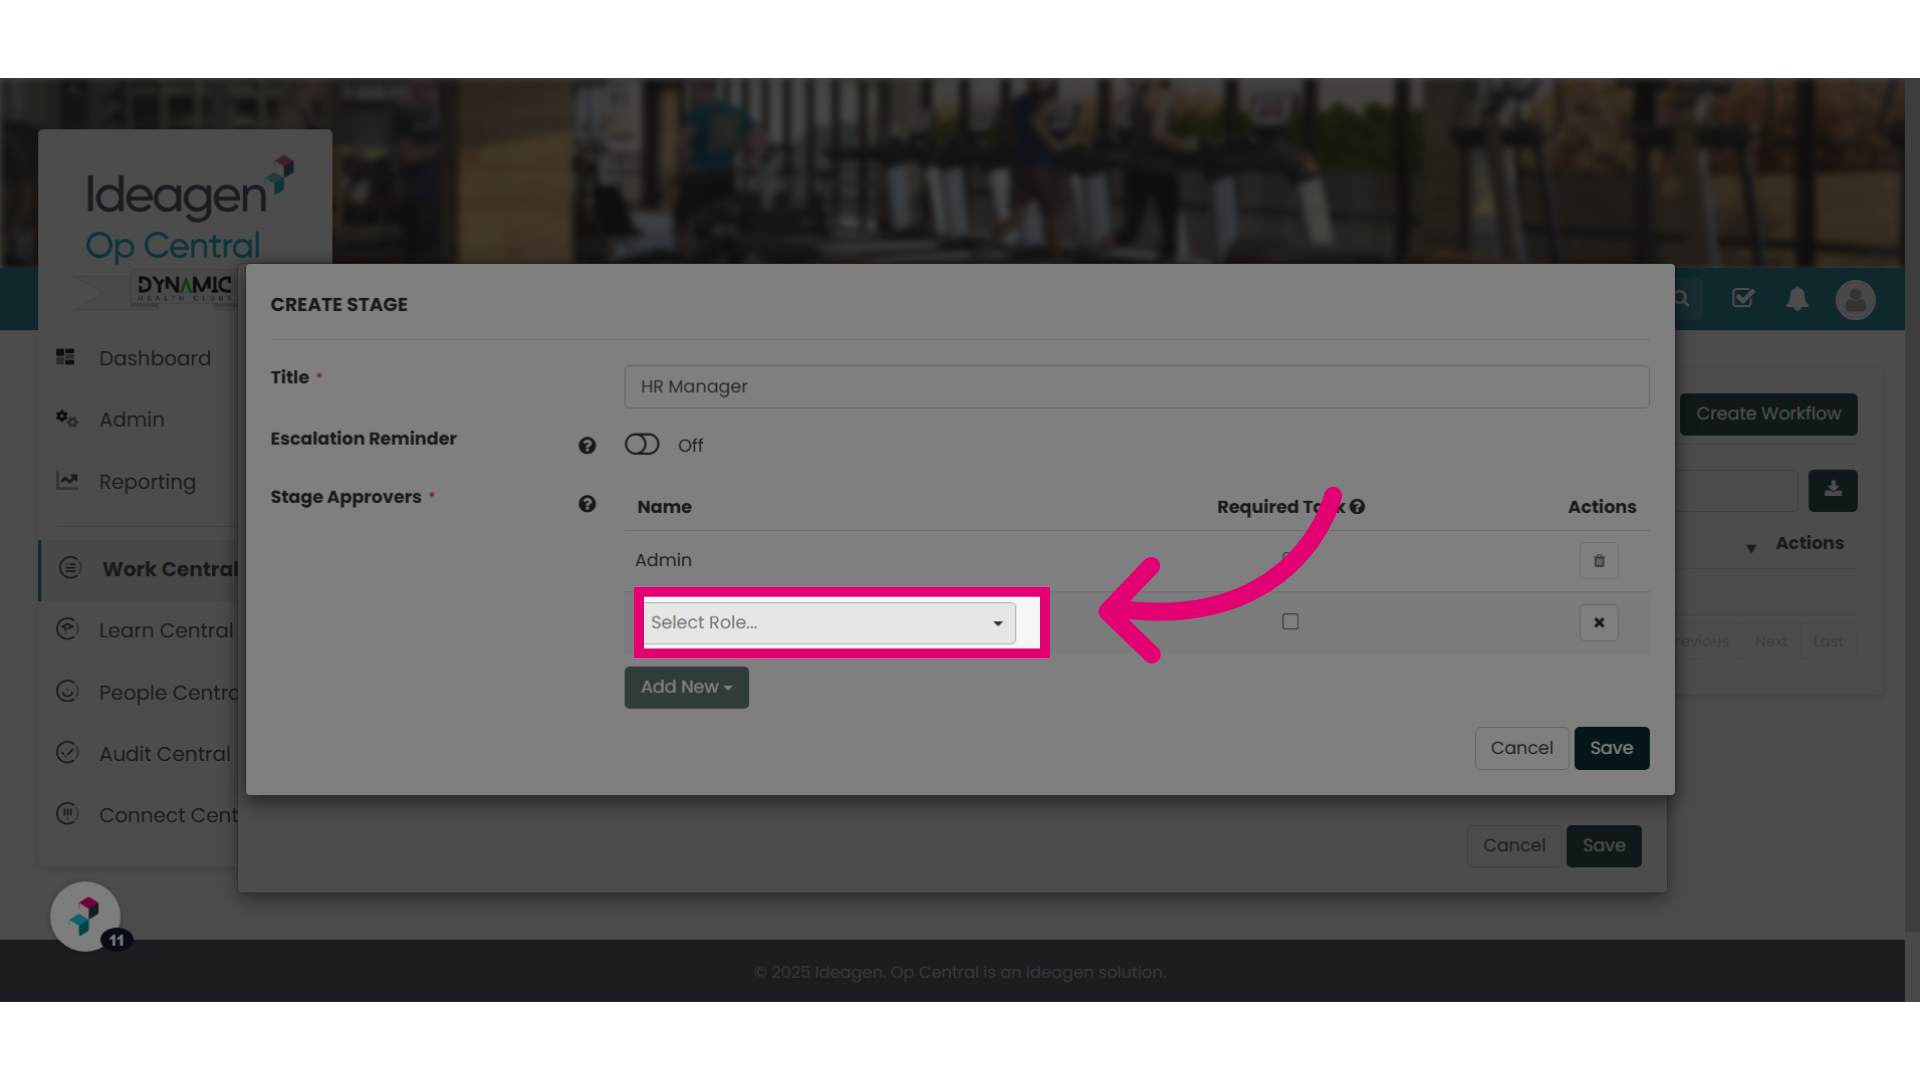
15. Example: Select the role you require
For this example, we are going to assign this task to a role.
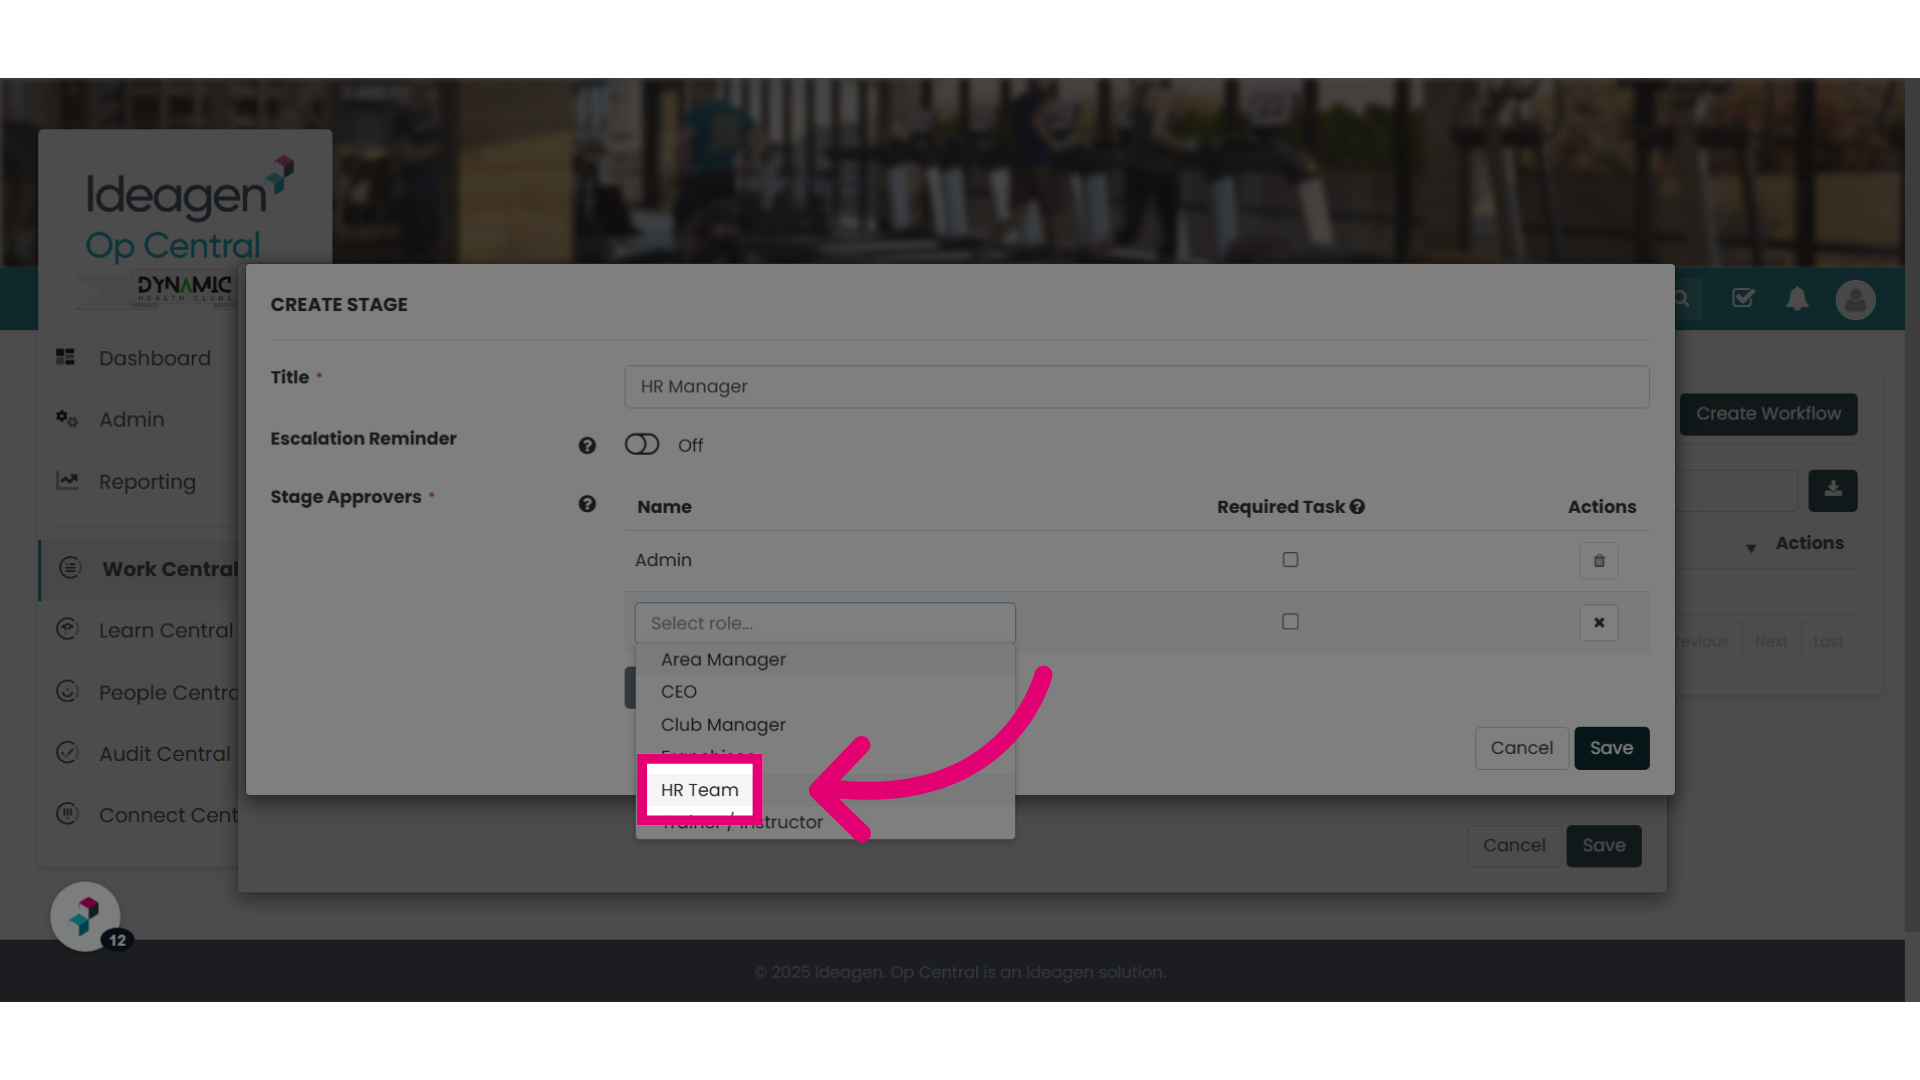
16. Check the Required Task box
Check the Required Task box. This means the users within that role group will receive an email and task notification when they need to complete a policy review.
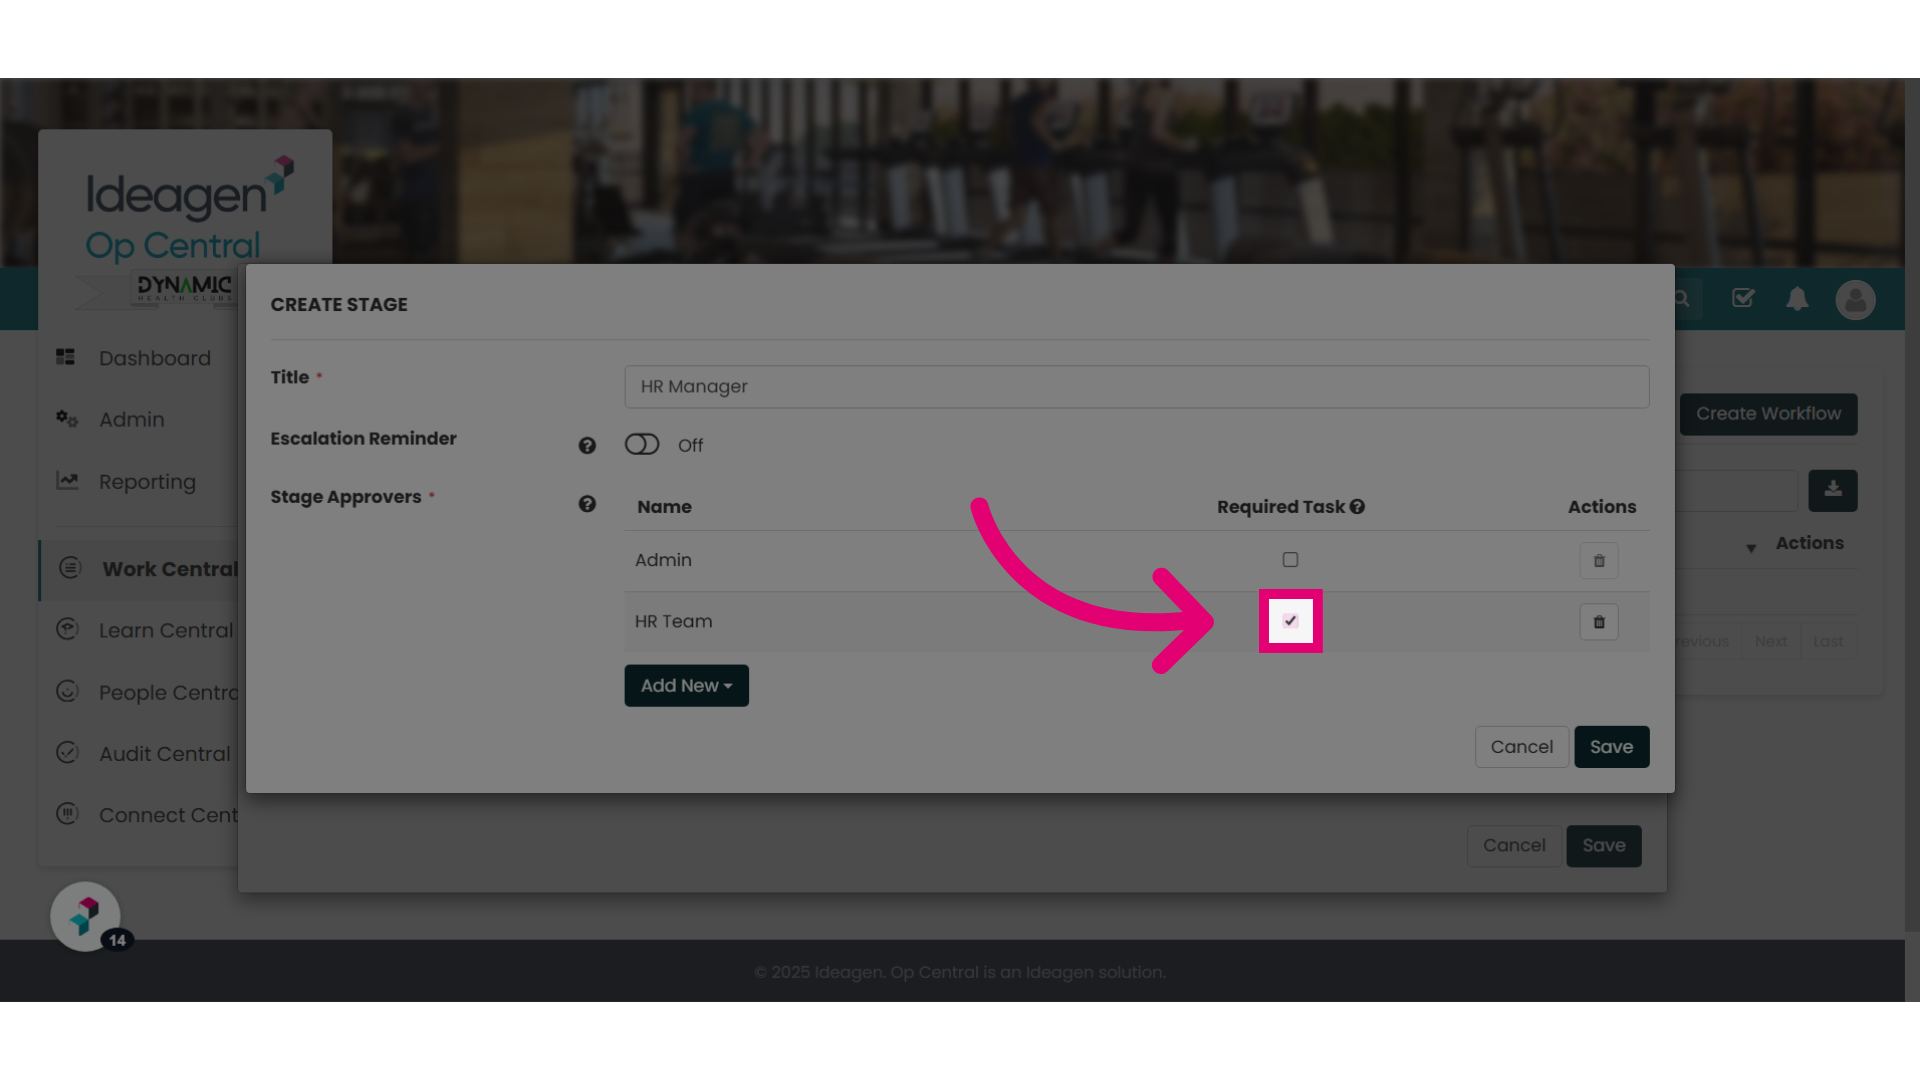
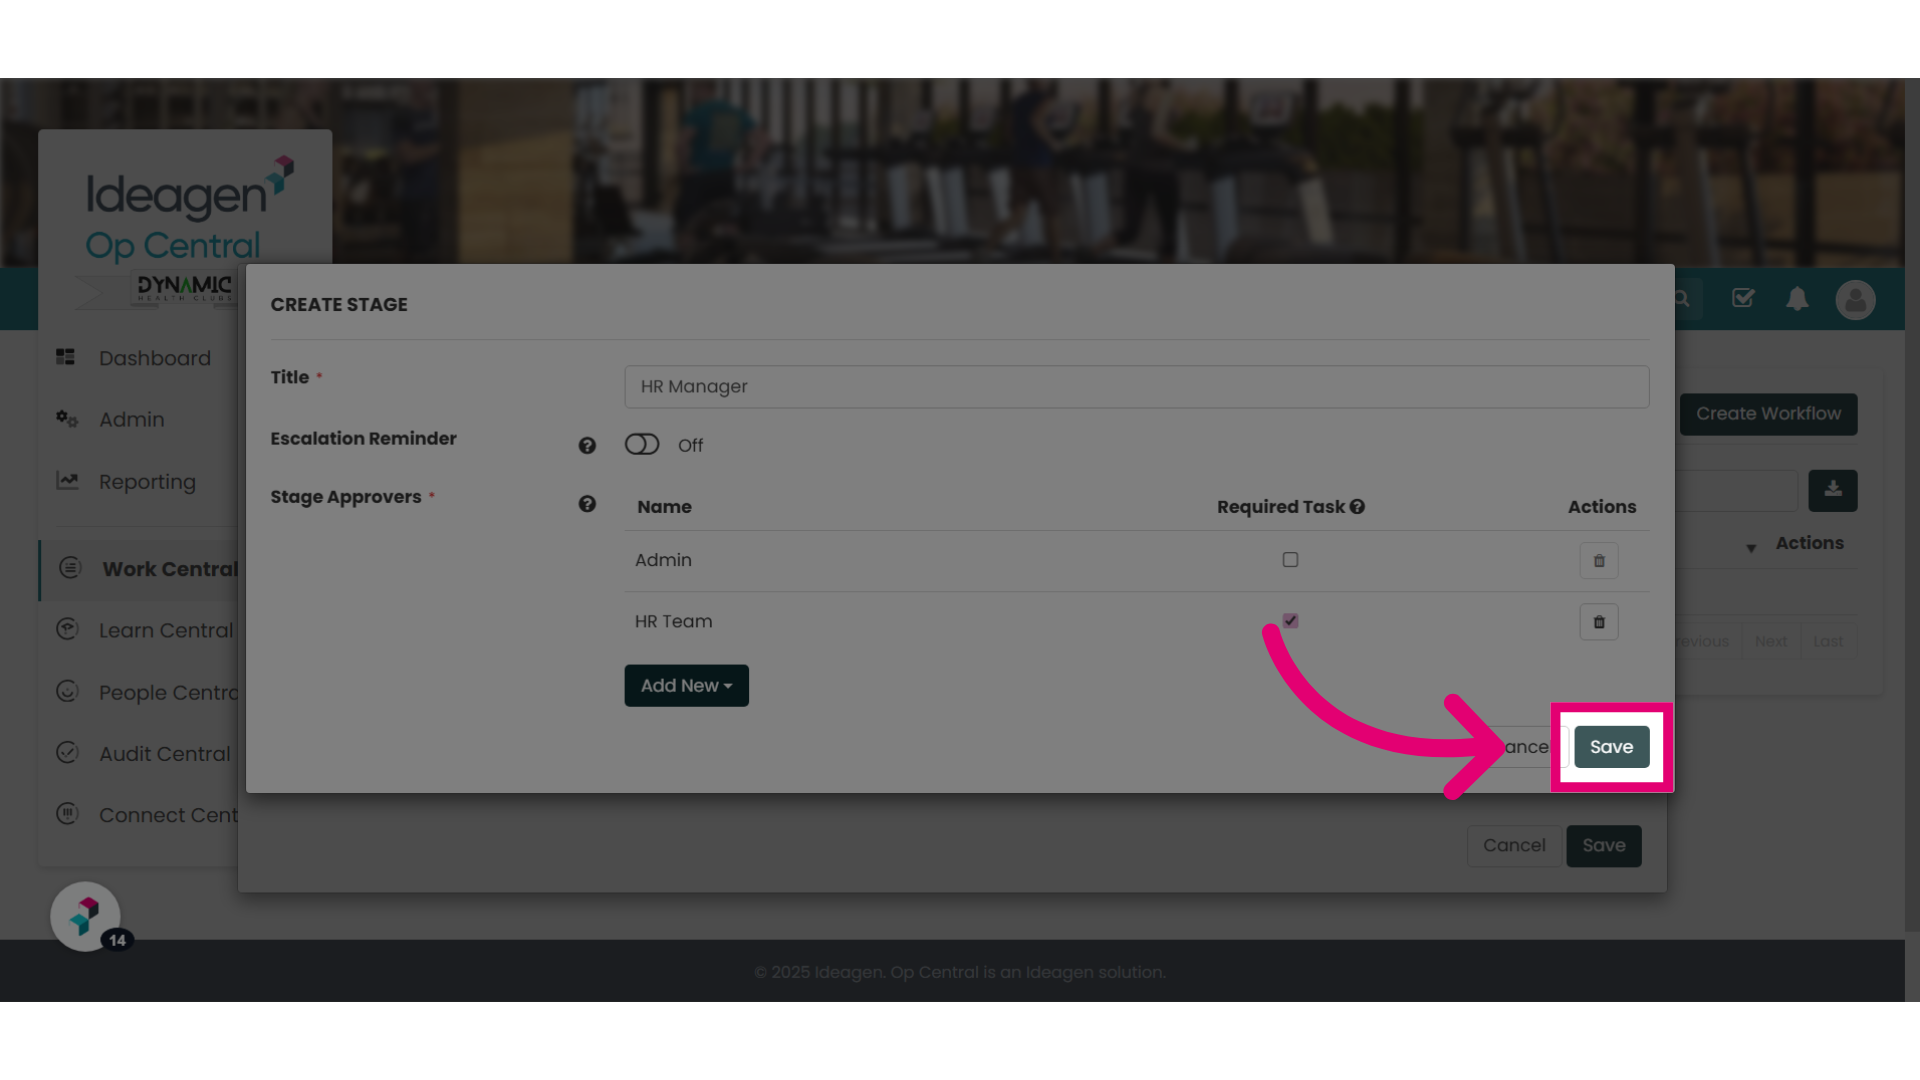
17. Click "Save"
Click on "Save".
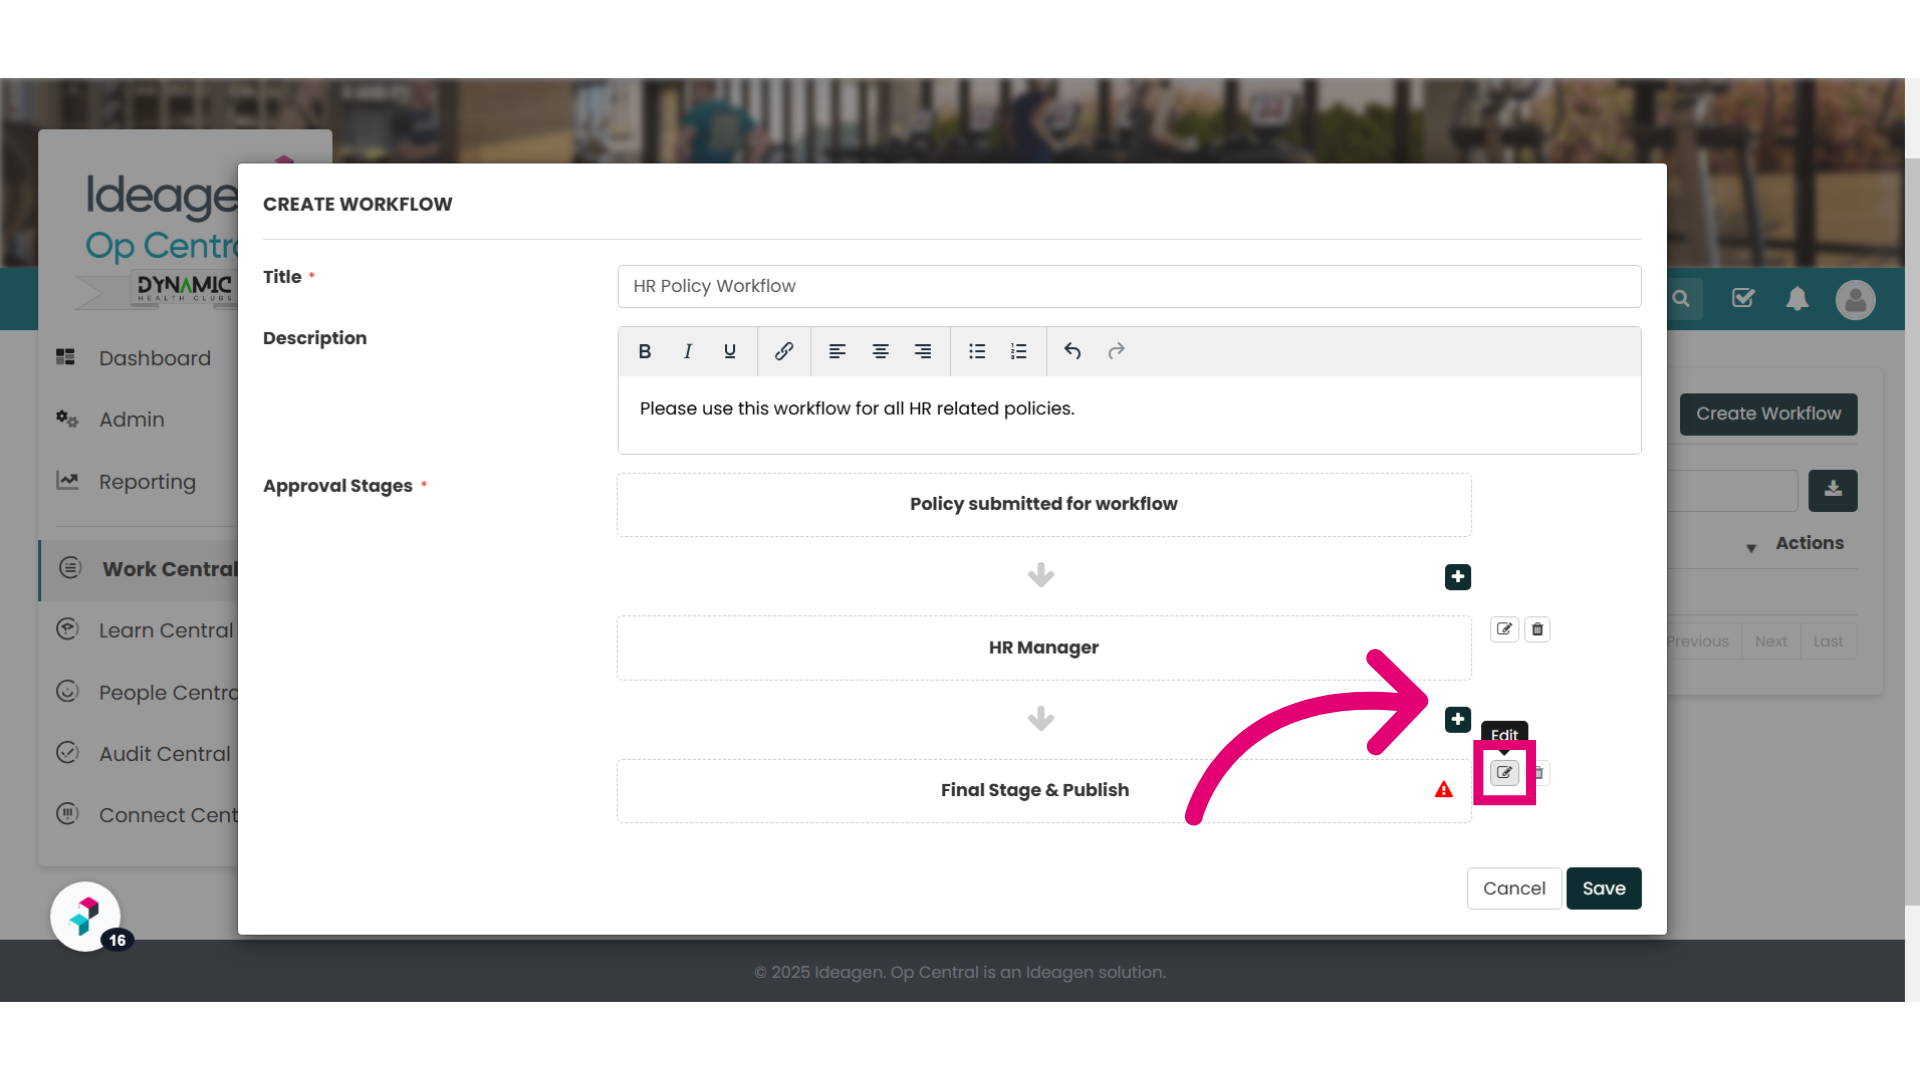
18. You can edit any workflow stage your create
You have now created the first stage of your workflow.
For this walkthrough, we are going to have a 2 stage workflow, but want to edit the Final Stage and Publish. To do this, select the edit button.
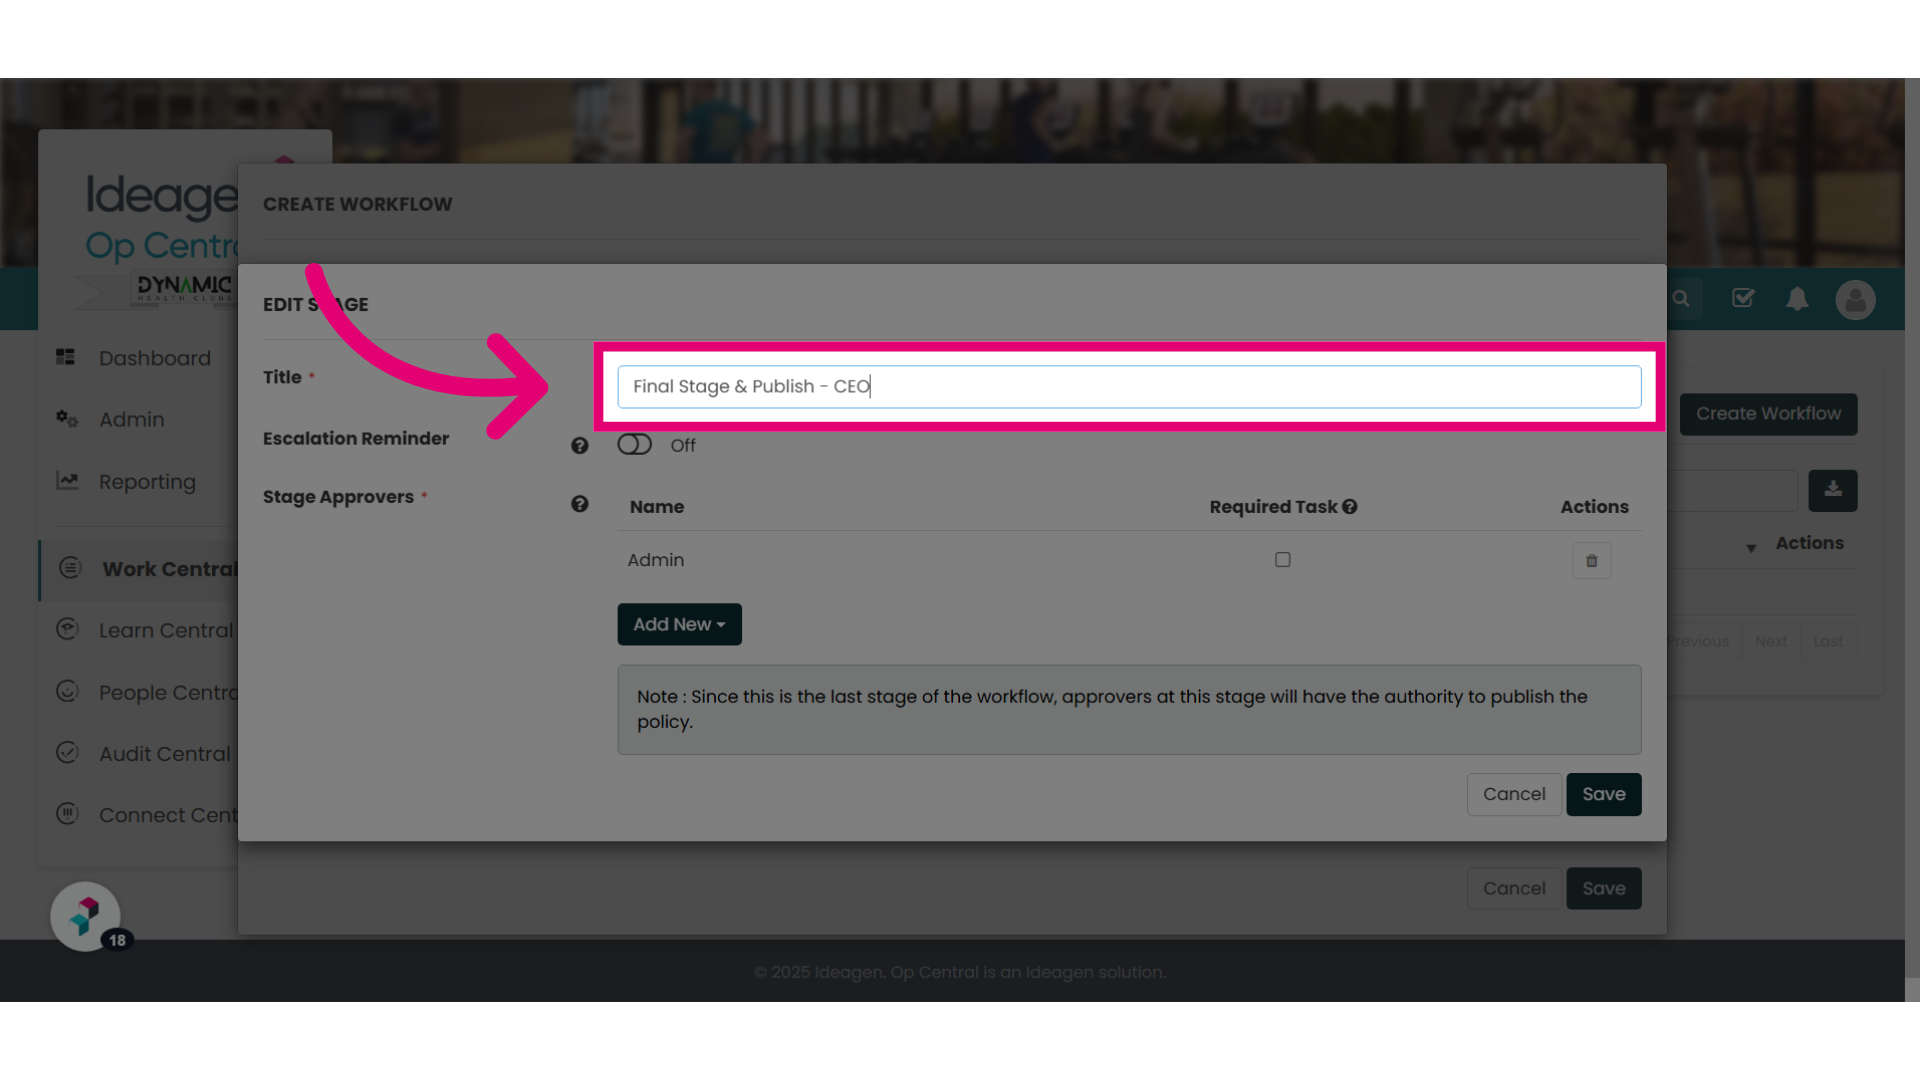
19. Update the name of the stage (if required)
Update the title. Final Stage and Publish will always be the default text for this stage.
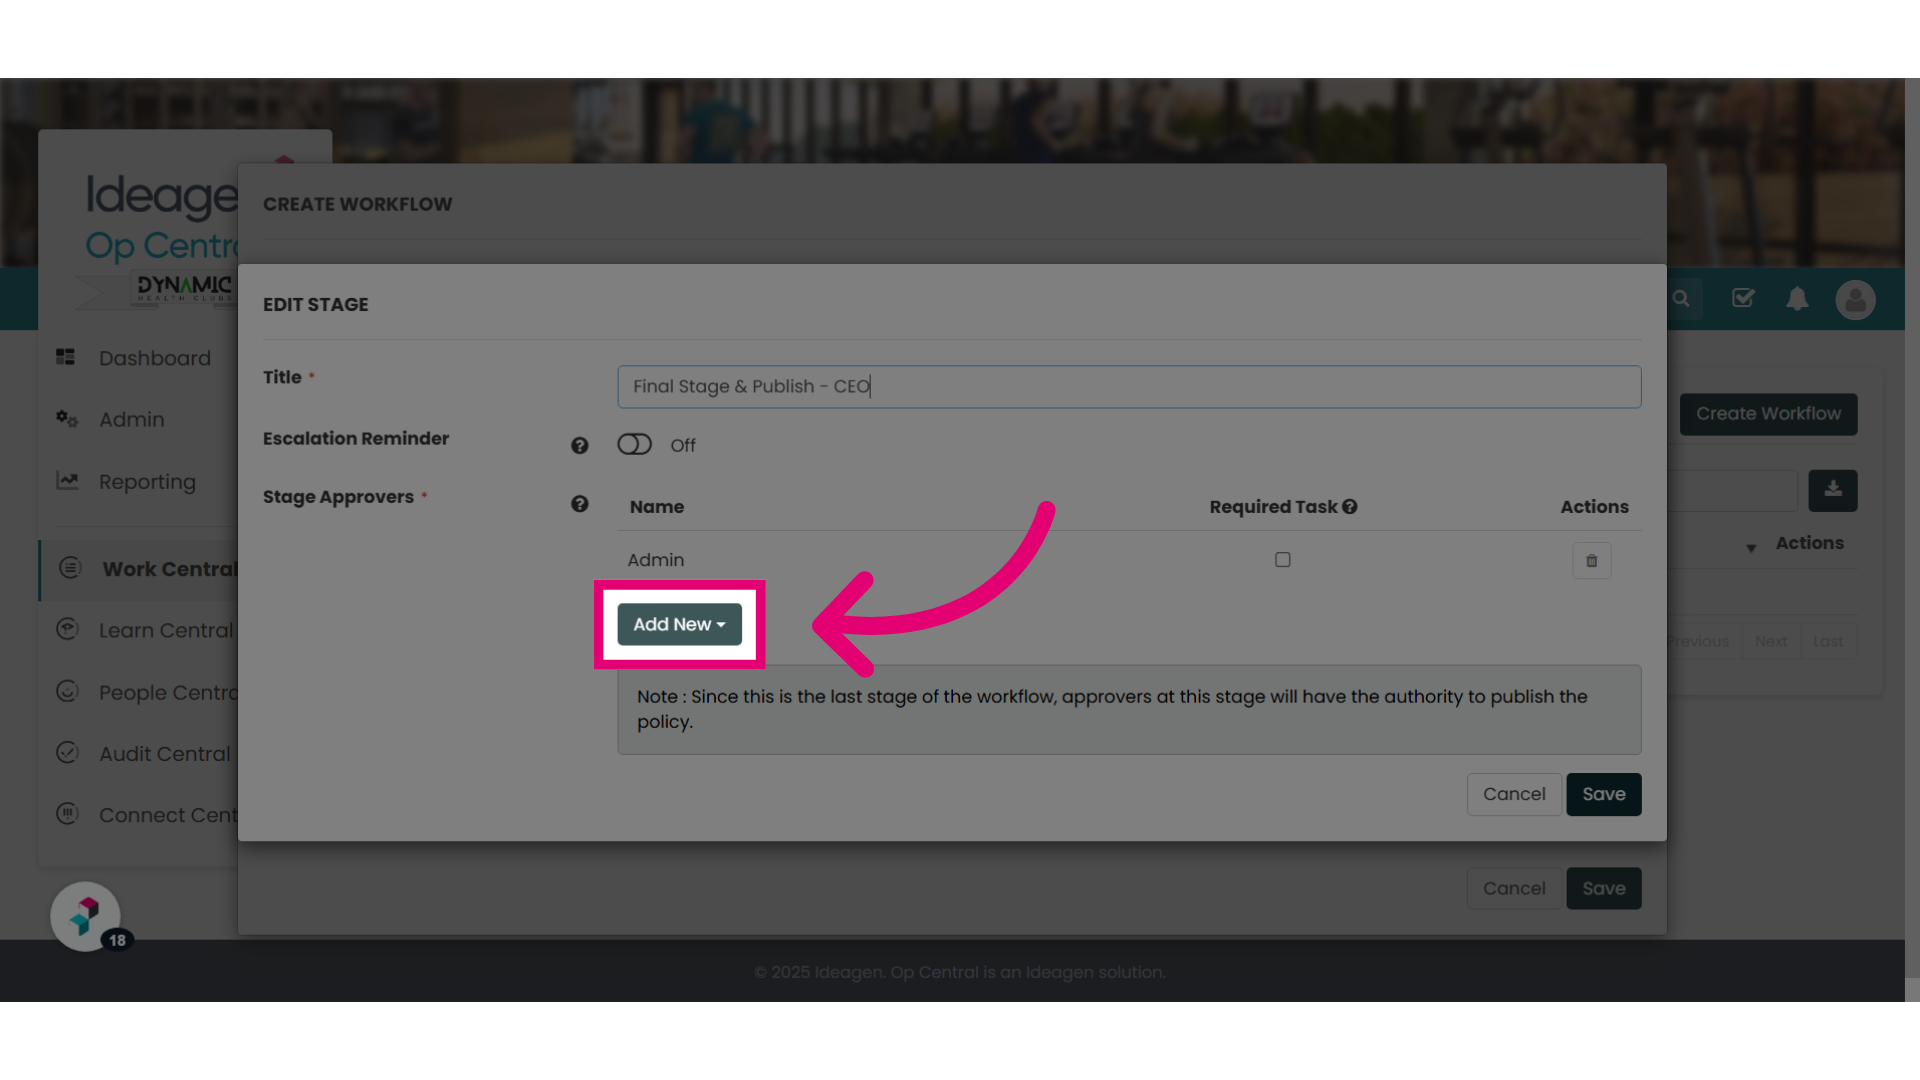
20. Click "Add New" to add a user as per previous steps
Select the "Add New" option
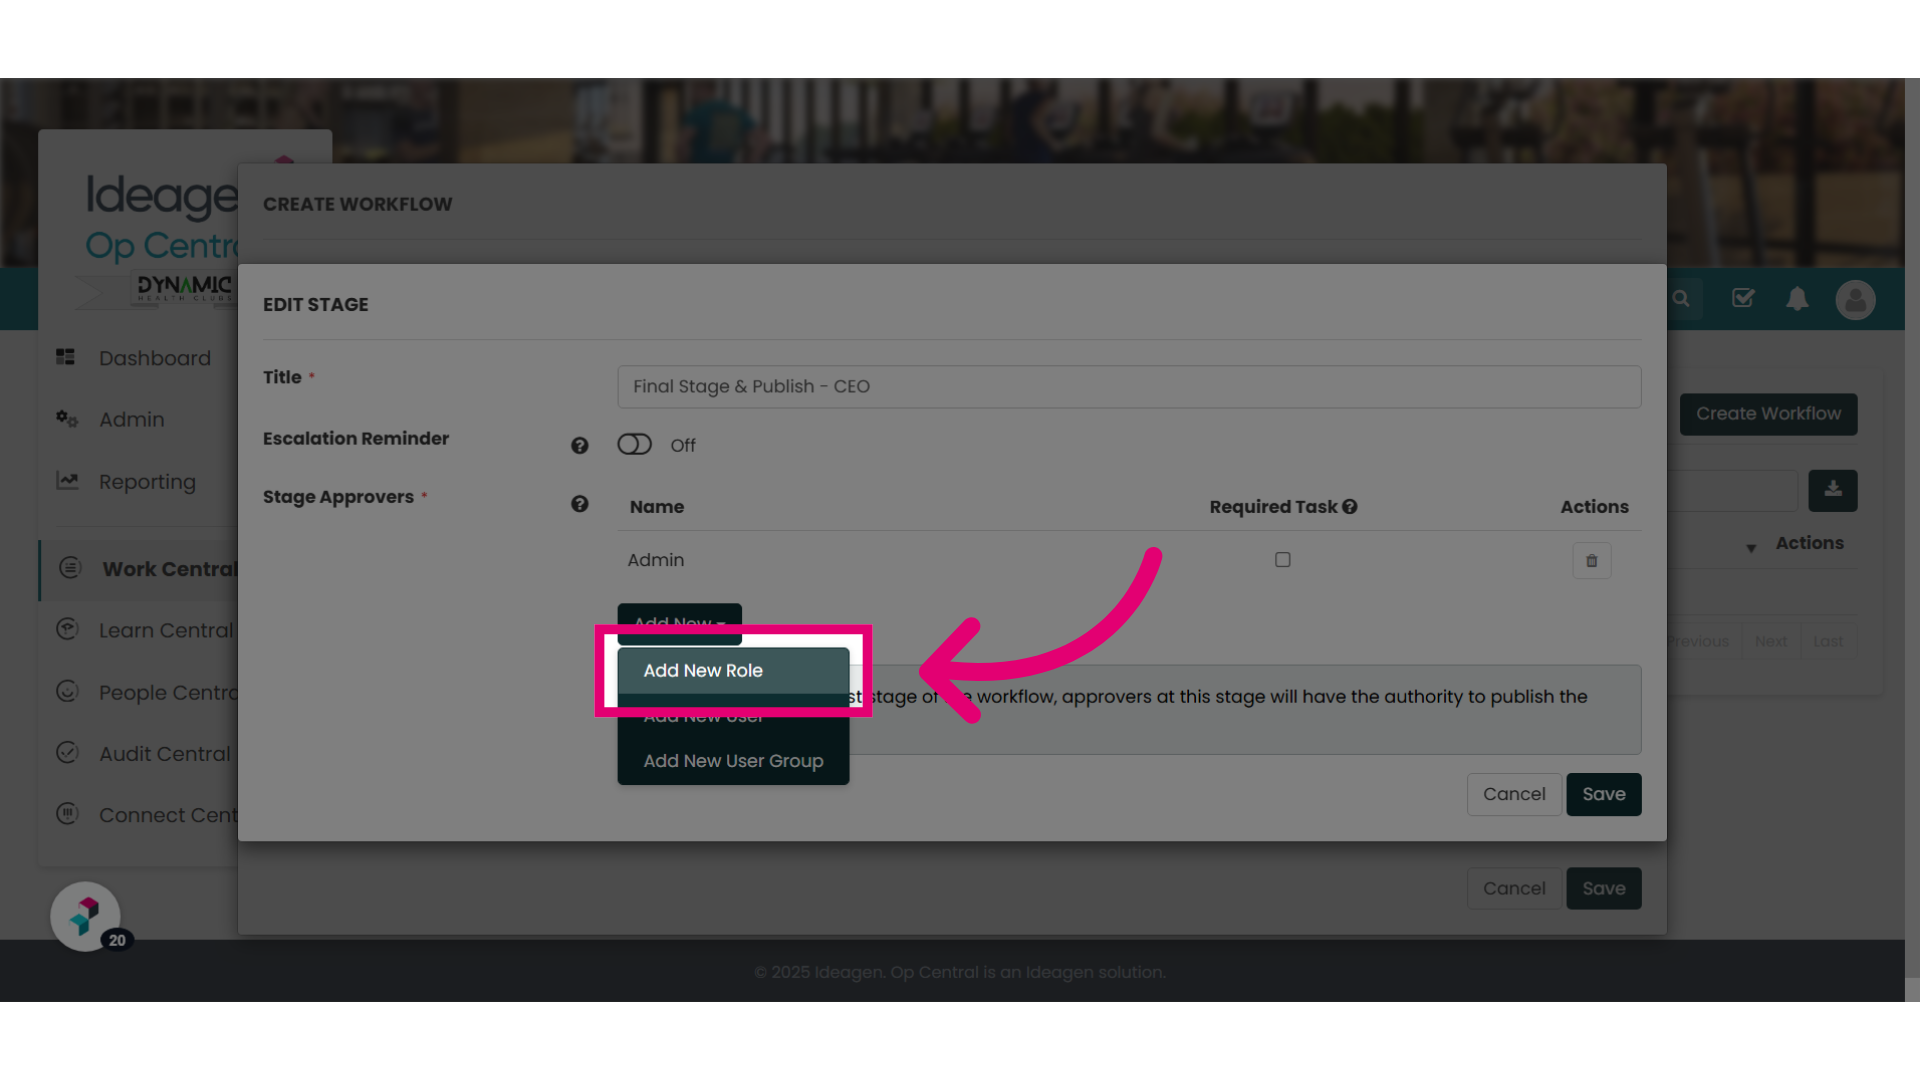
21. Example: "Add New Role"
Choose the "Add New Role" option. Again you can choose what is suitable for your organisation.
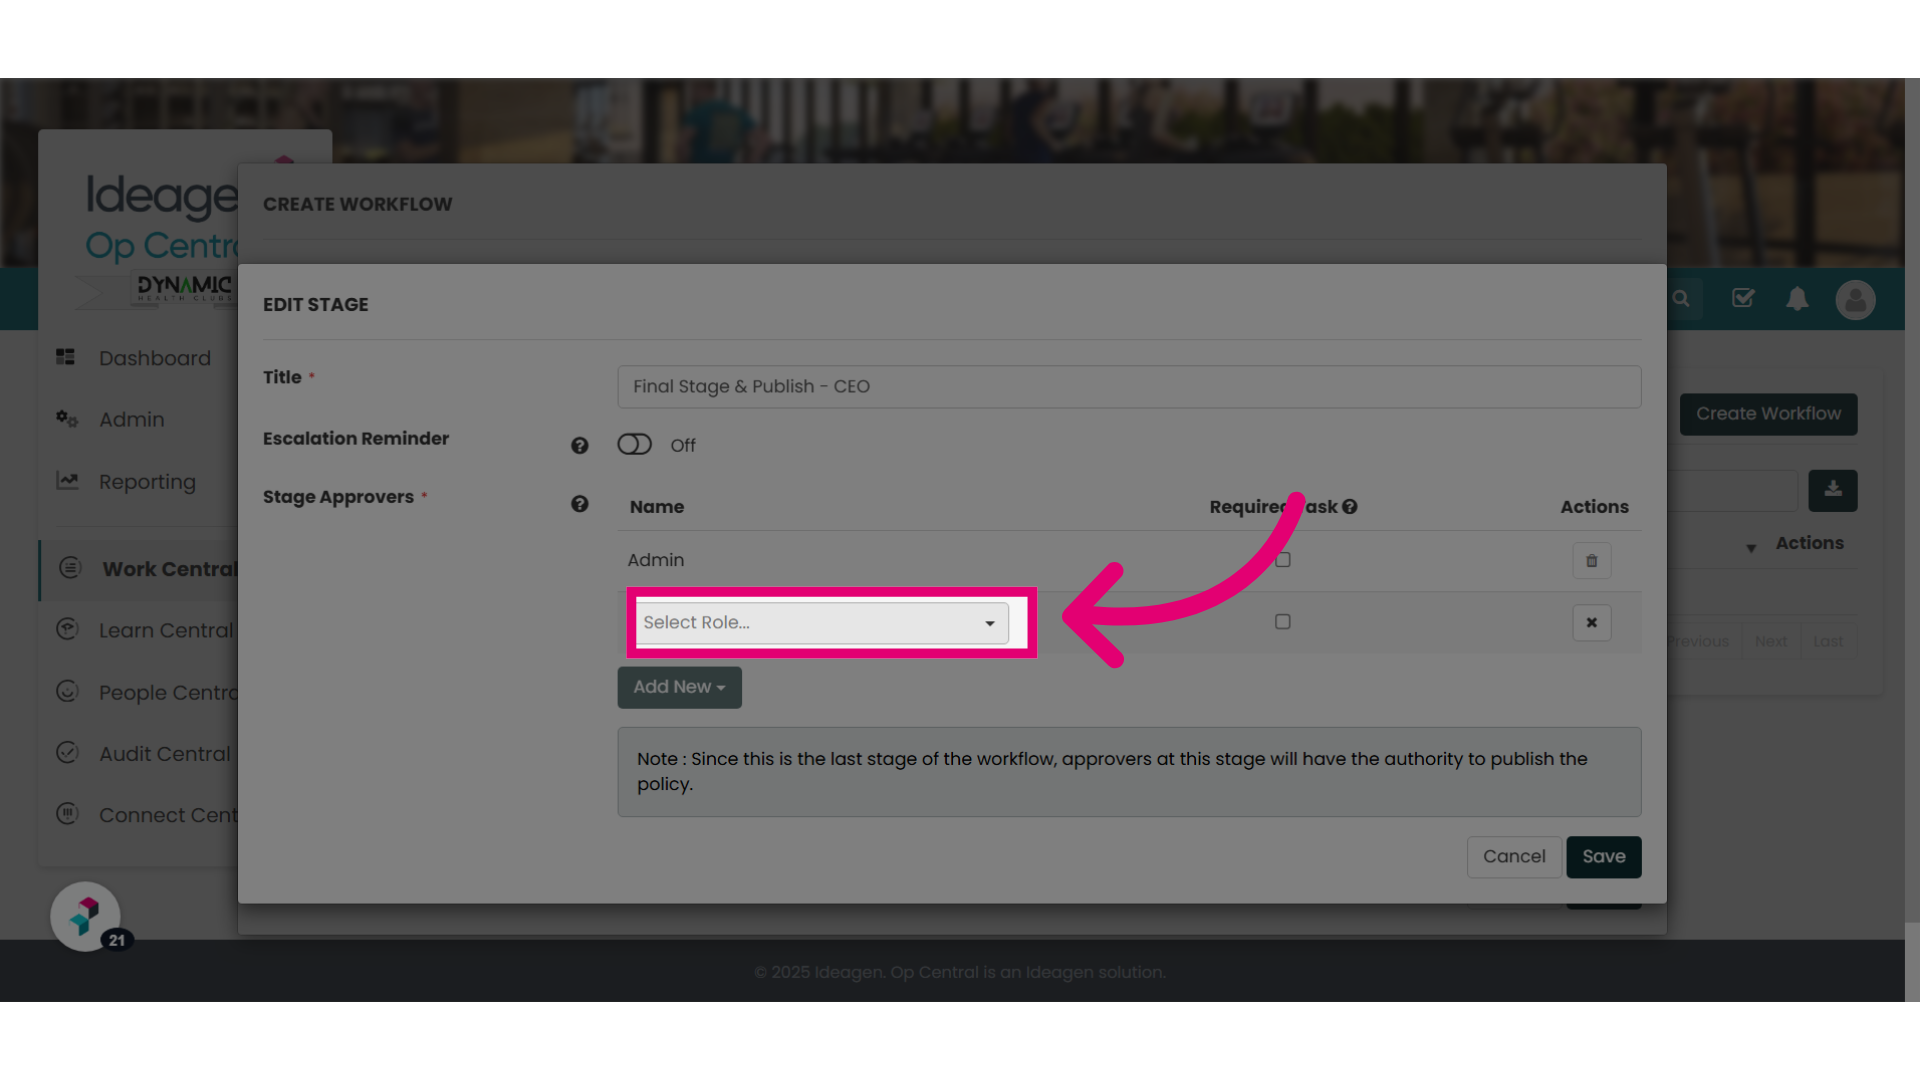
22. Example: "Select role..."
Click on the "Select role" field
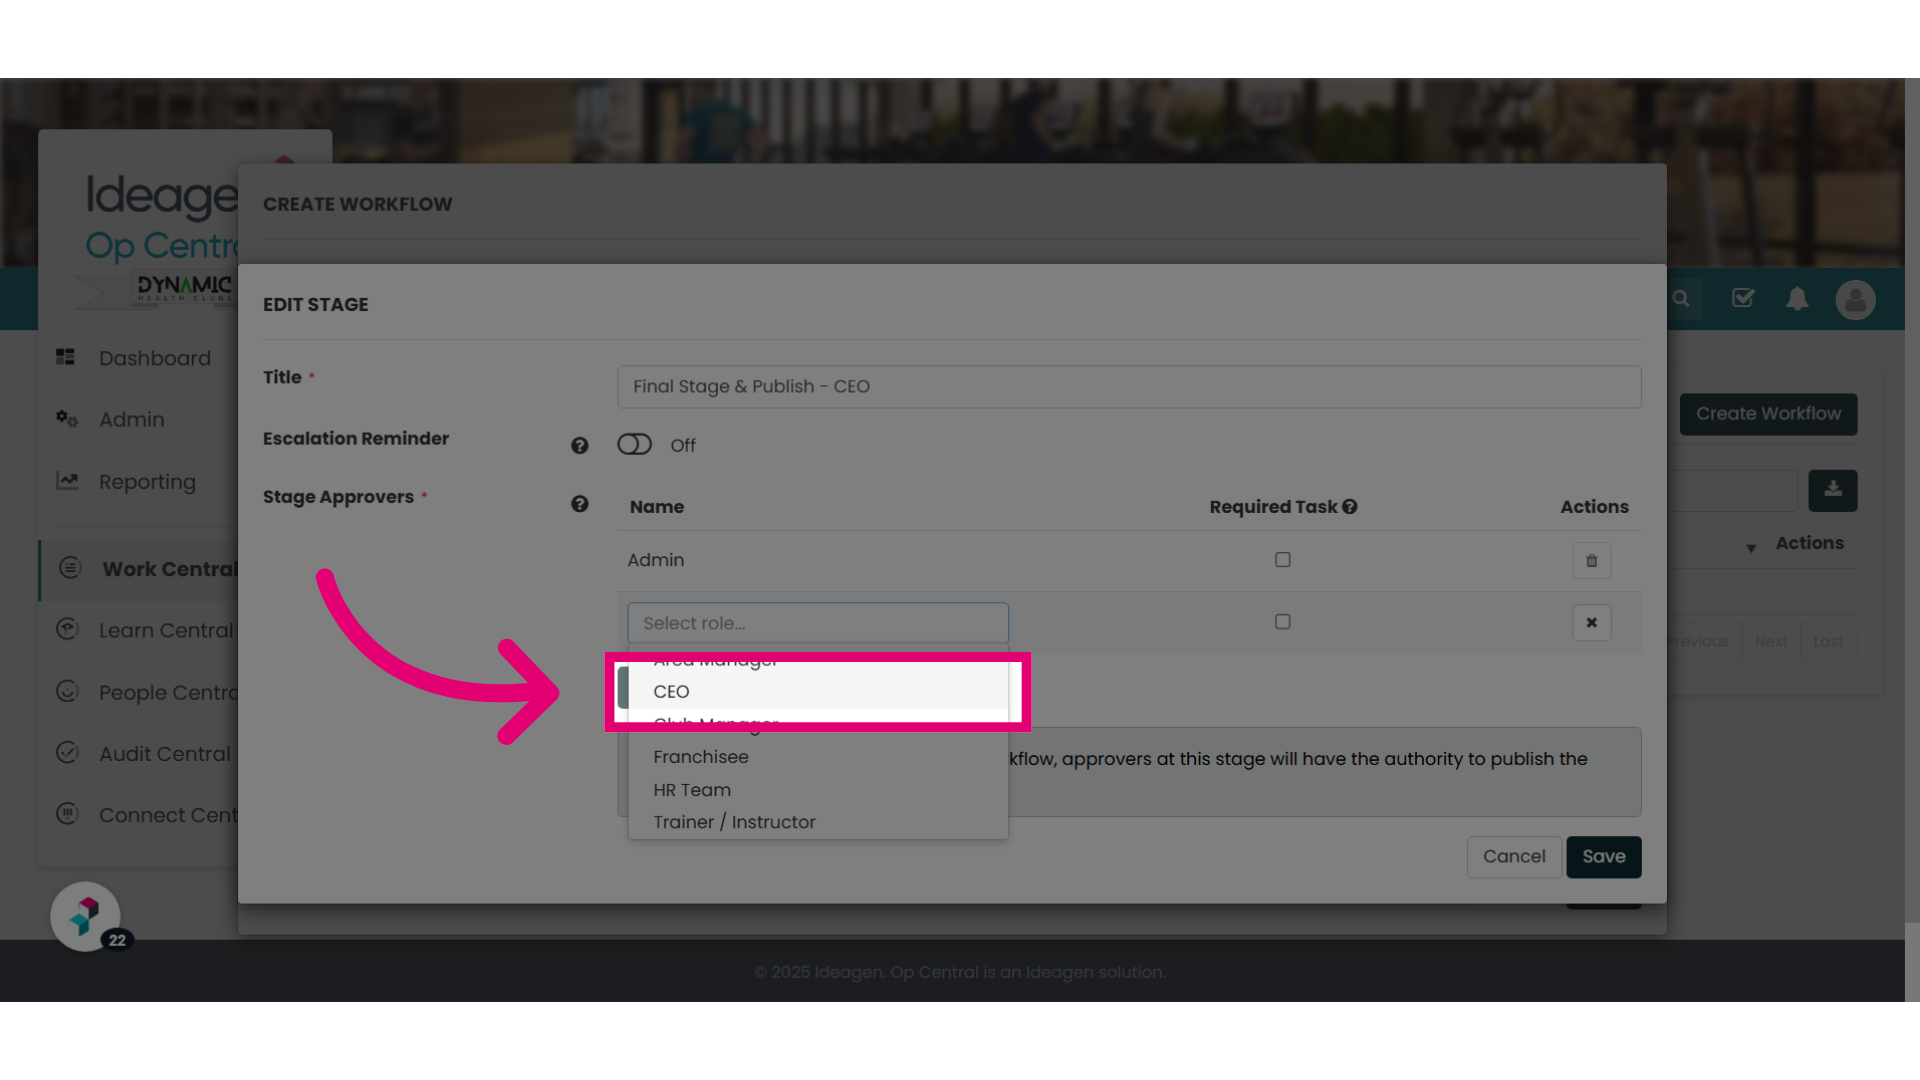
23. Example: Select the role you require
Select relevant role who you want to conduct the final approval and publish.
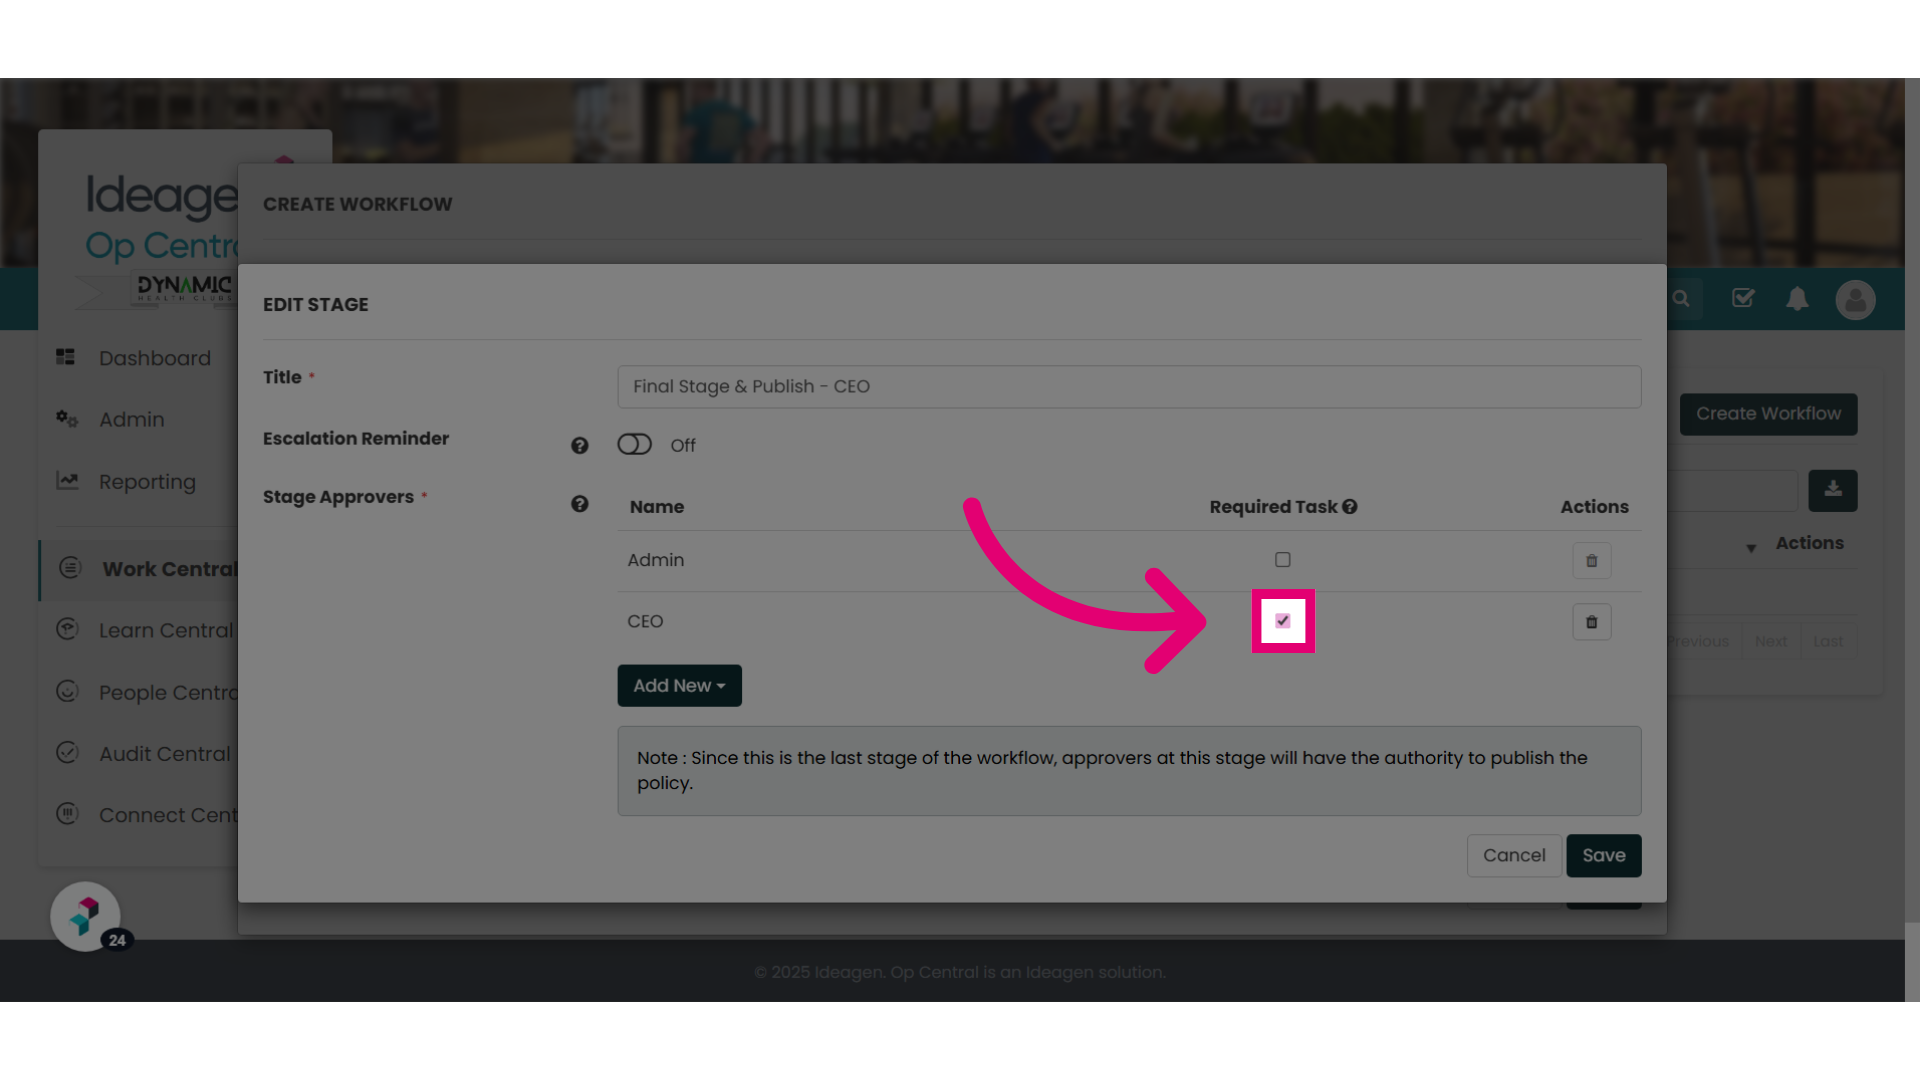
24. Check the Required Task box
Navigate to the required task check box. Turn this on for the relevant role. If you want the final approval to be with an Ideagen Procedure Management Admin, you can simply select Required Task next to Admin.
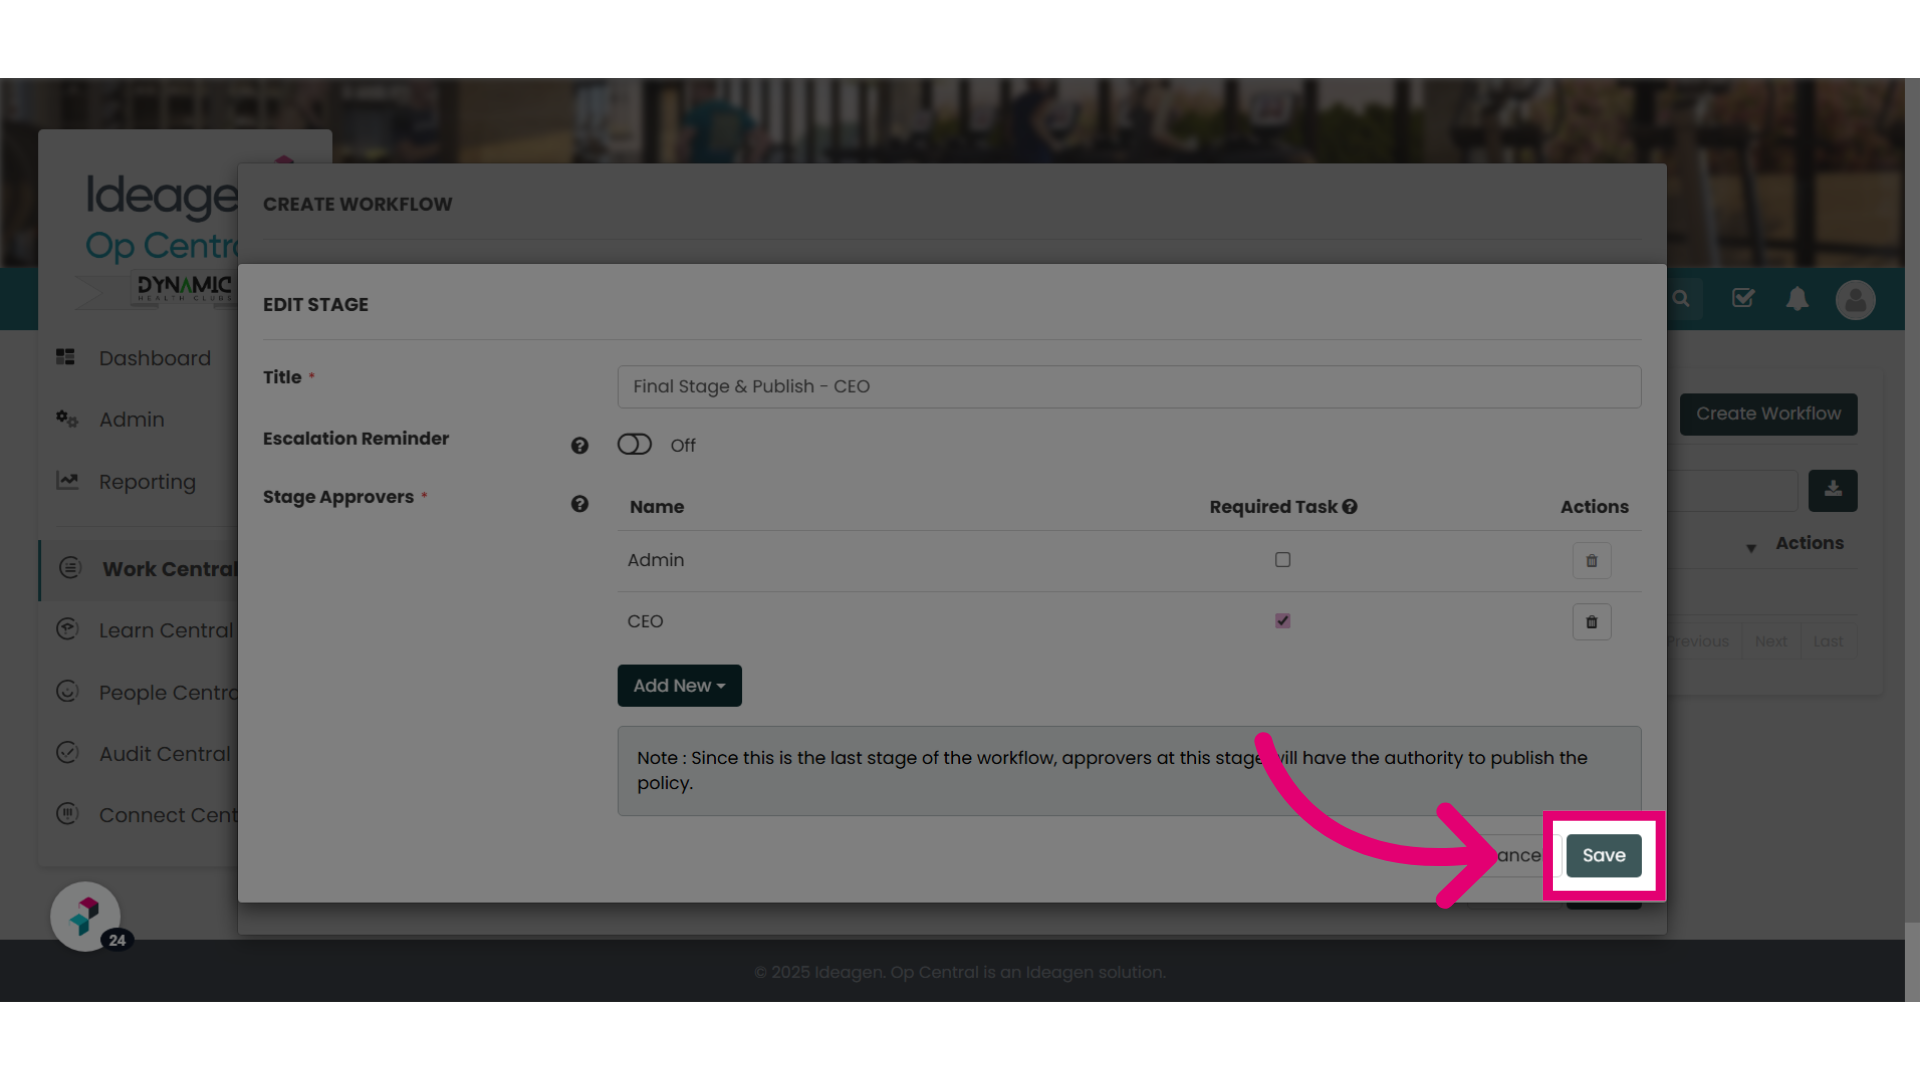
25. Click "Save"
Click on Save.
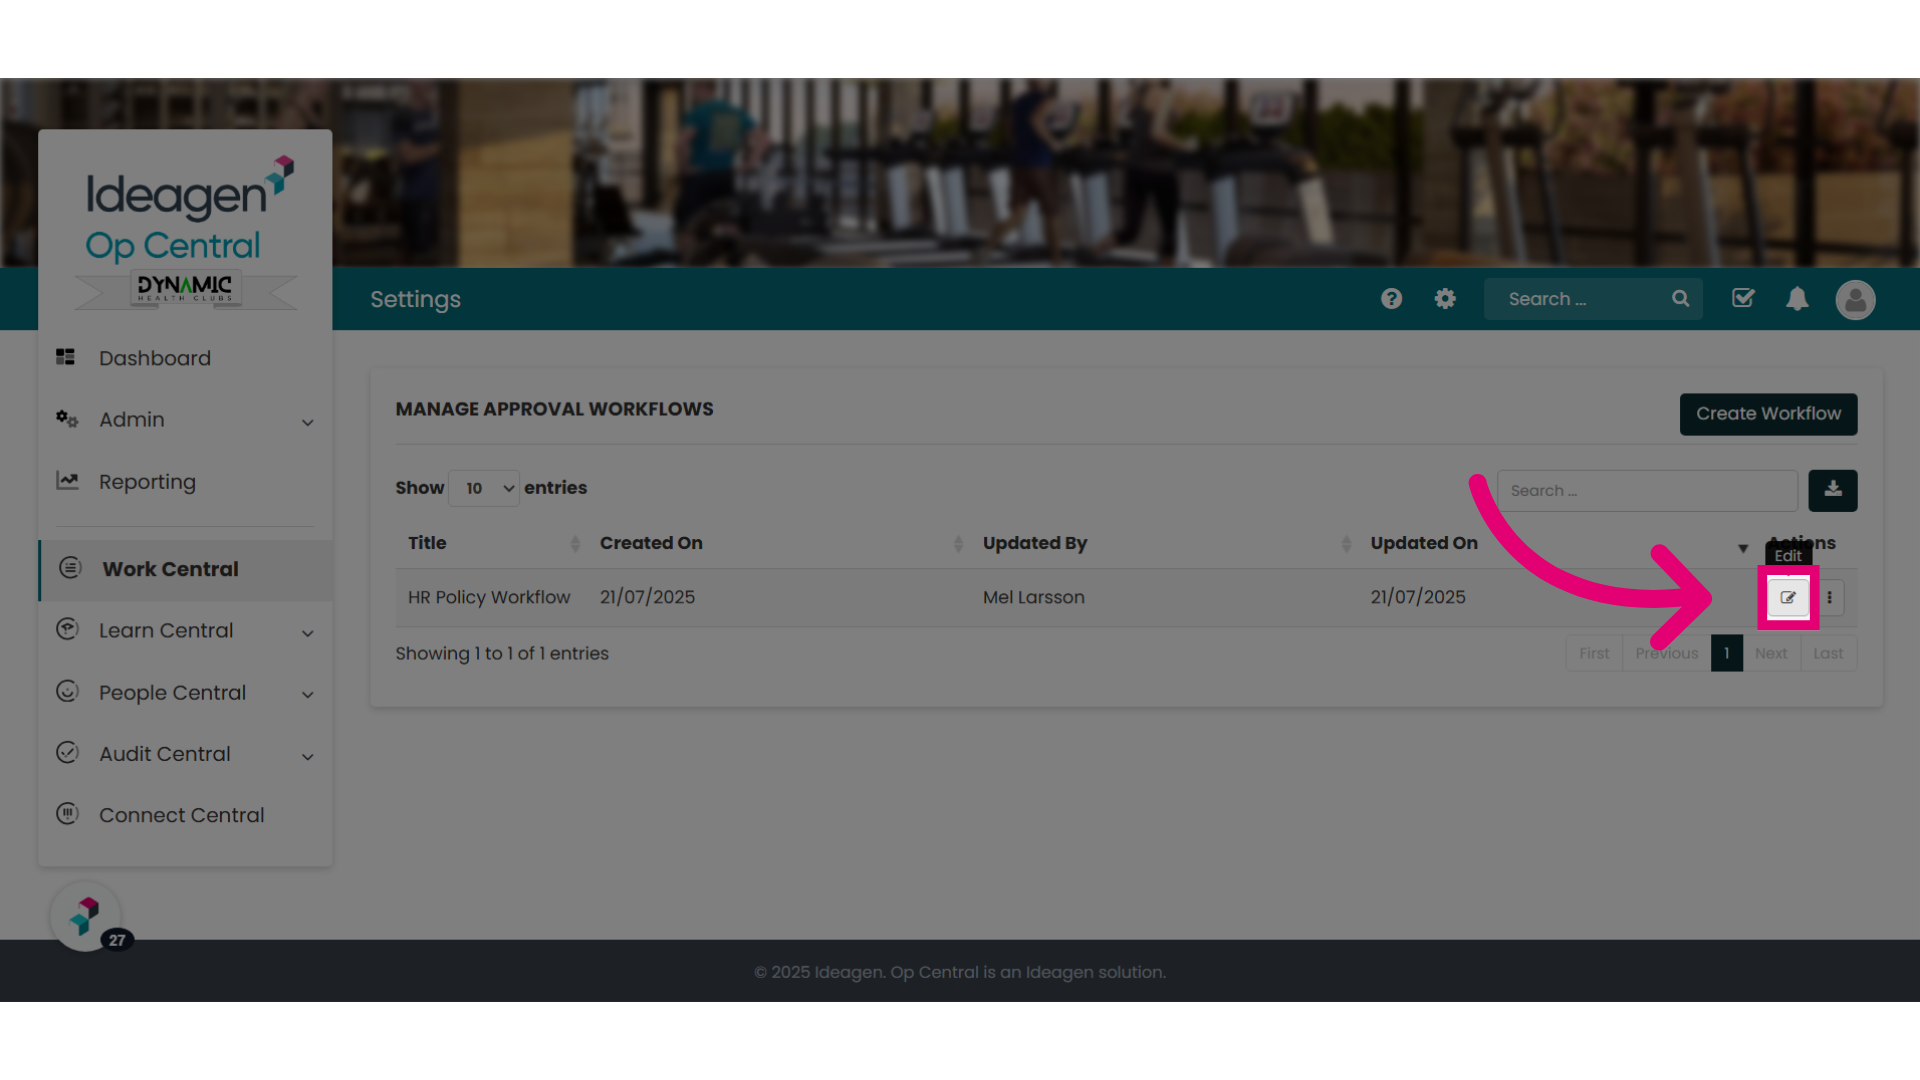
26. Your workflow has been created
You now have your first workflow set up. From the Manage Approval Workflows screen you can go back and edit the workflow at anytime.
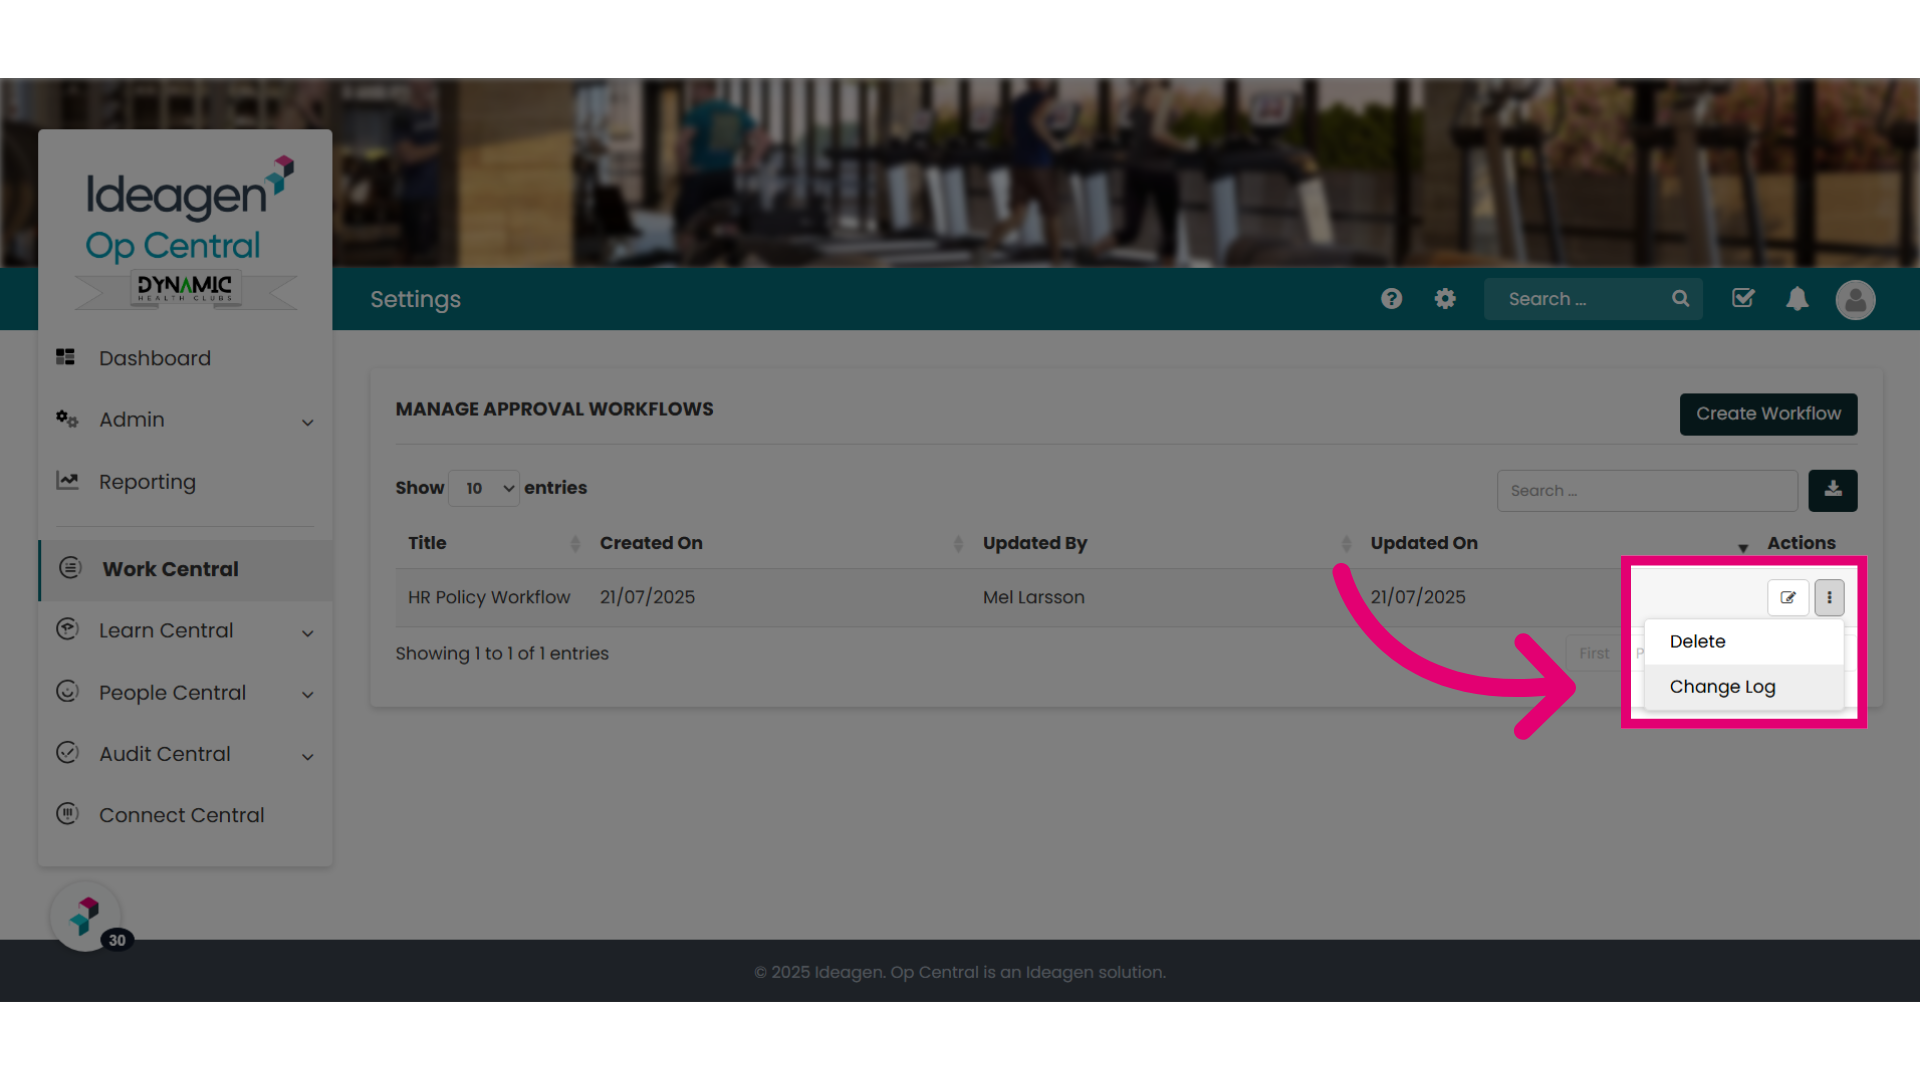
27. The Ellipses menu next to a workflow
Selecting the ellipses next to a workflow will give you additional options, such as deleting the workflow or viewing the change log.
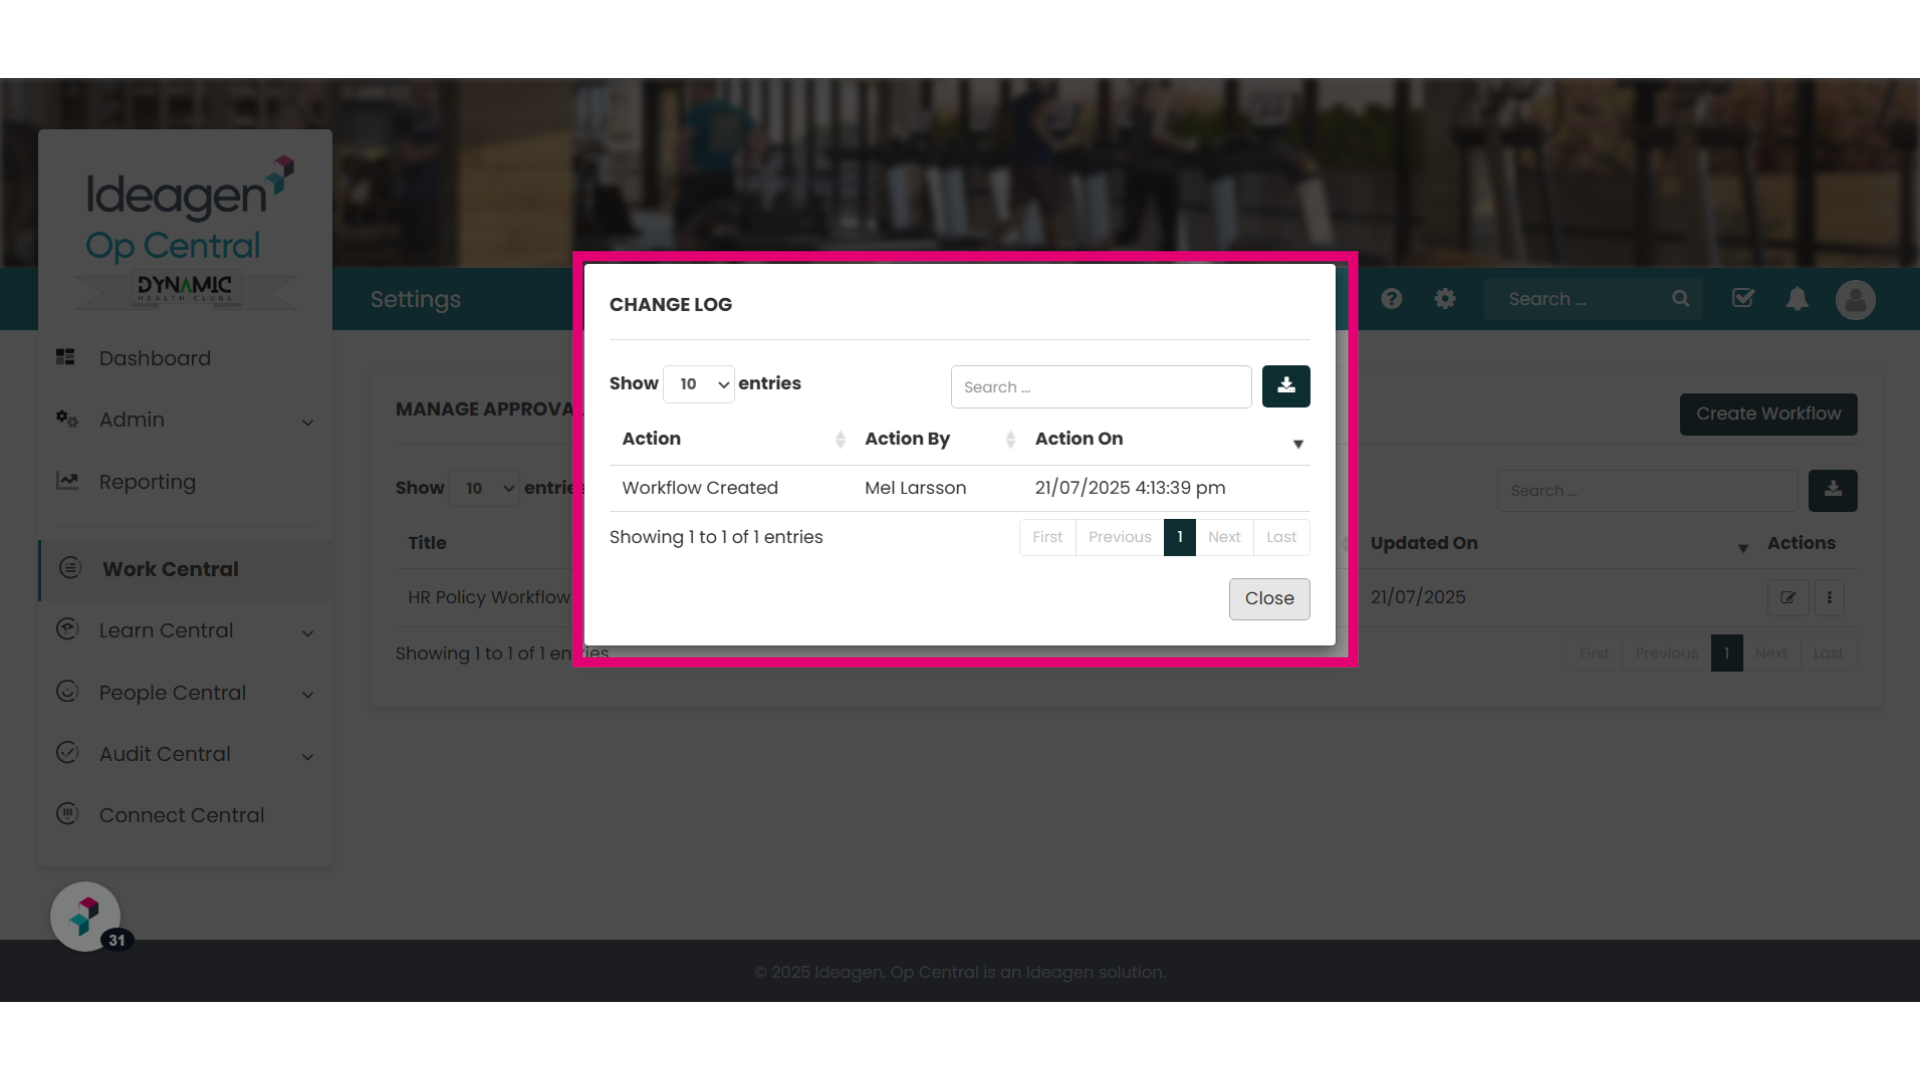
28. The Change Log will show you any actions taken on the workflow.
From the change log screen, you can see when the workflow was created and by who.
29. To return to the Manage Policy Approvals landing page
To return to the main workflow dashboard or landing page click the ellipses, and select Manage Policy Approvals.
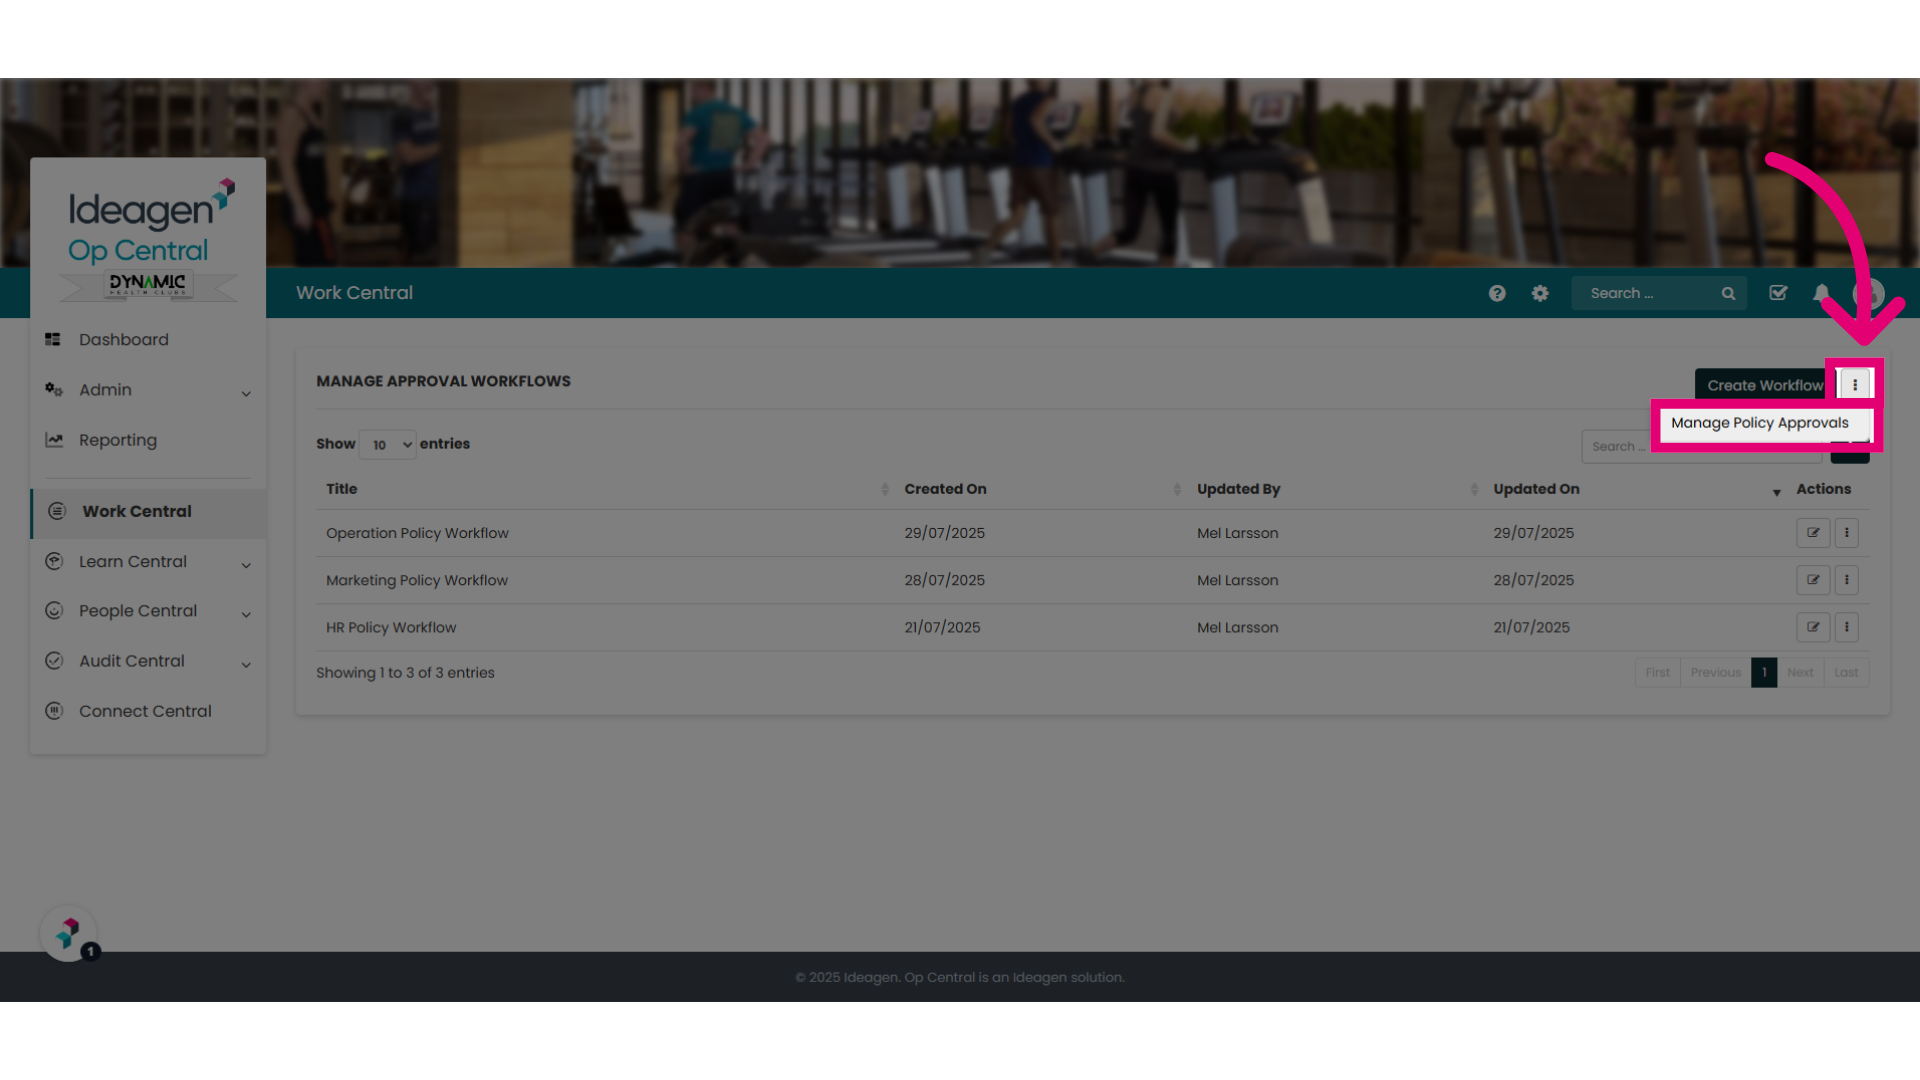
30. You have now returned to the "Manage Policy Approvals" landing page
You are now back on the Manage Policy Approvals landing page, and have learnt how to create your workflows.